
Where to Put Rear Dash Cam Best Placement Guide 2026
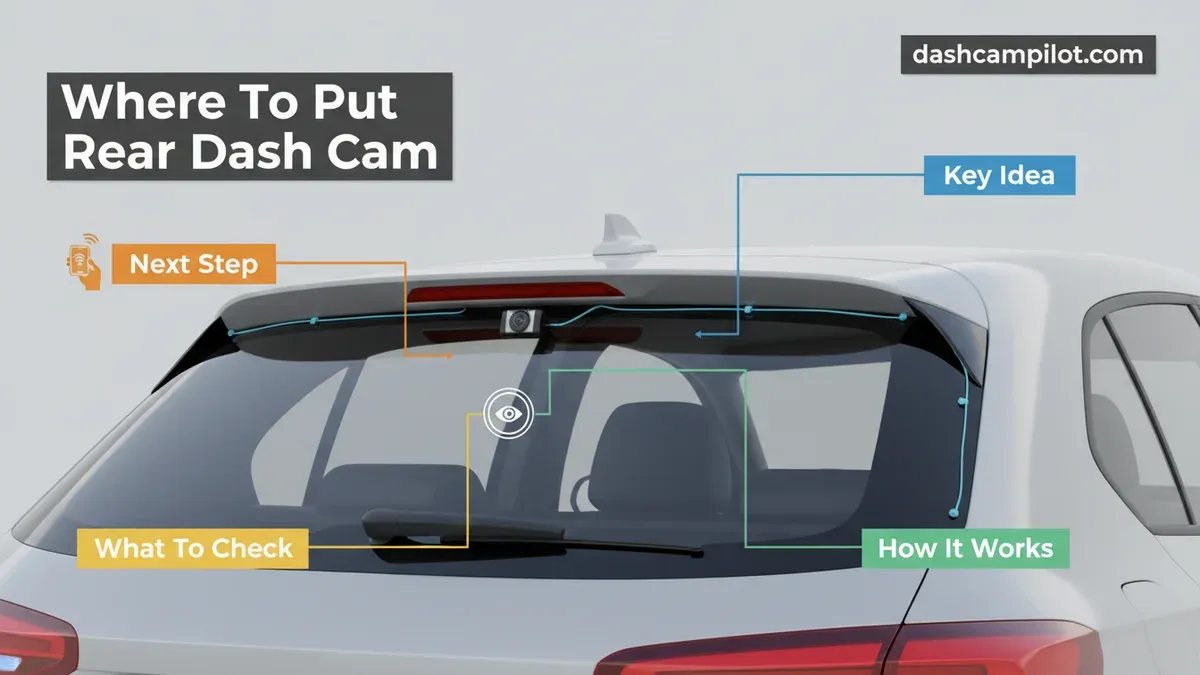
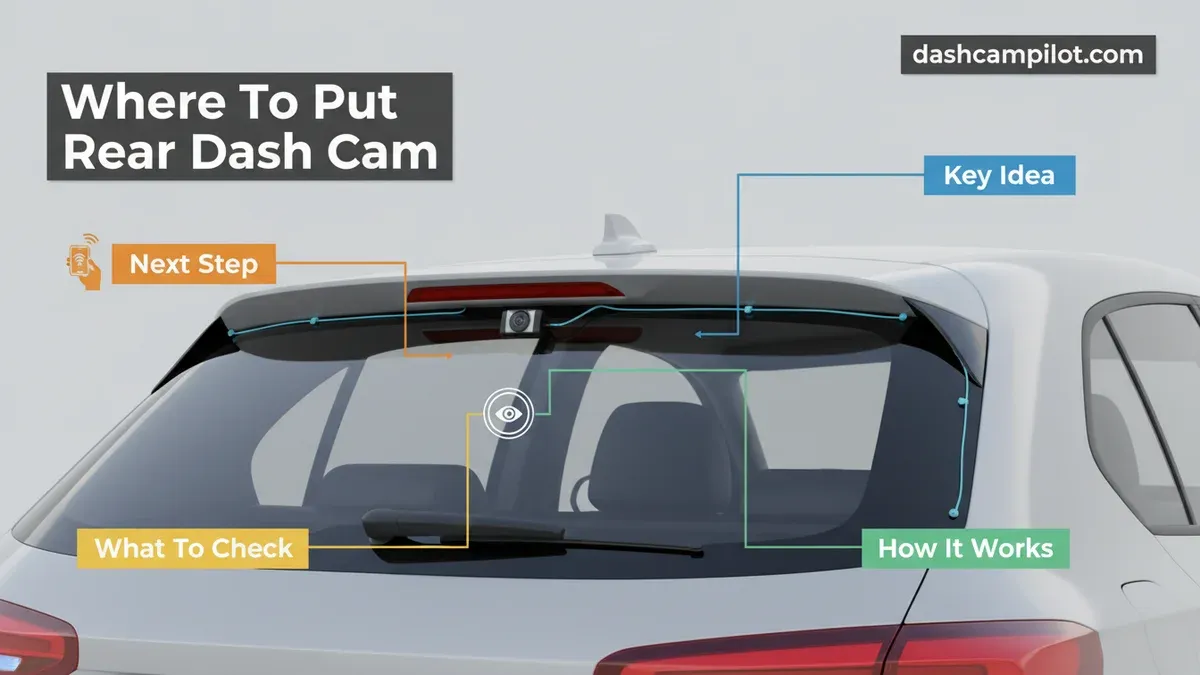
The ideal spot for your rear camera is the top-center of the rear windshield directly within the rear wiper's wiping path. Position the lens just below the high-mount brake light while keeping the adhesive base between defroster lines to avoid thermal damage.
The single best spot to mount your rear dash cam is the top-center of your rear windshield, positioned directly inside the clearing path of the rear wiper blade. Mounting at the upper edge gives the camera an elevated vantage point over following traffic, reduces headlight glare from trailing vehicles at night, and captures license plates accurately across multiple lanes. Most critically, aligning the lens with the rear wiper path guarantees your footage stays crystal-clear during heavy rain, winter slush, and standard road mist.
Placing the camera just a few inches off-target ruins an otherwise pristine installation. If you stick the lens outside the wiper sweep, road grime accumulated over a twenty-minute highway drive will render modern 2026 high-resolution sensors completely useless. Furthermore, misaligning the lens across heating elements or high-mount third brake lights introduces persistent optical flare, obstruction, and night-time reflection that defeat the purpose of your investment.
Key Takeaways
- Mount the camera top-center on the rear windshield within the rear wiper's cleaning arc.
- Place adhesive strictly between horizontal defroster grid lines to prevent wire damage upon removal.
- Route wiring through rubber weather-stripping boot grommets on SUVs and hatchbacks to protect against leaks.
- Run cables along headliners carefully behind side-curtain airbags rather than across deployment paths.
- Position truck rear cameras high on vertical glass, clearing sliding window seams and third brake lights.
What Causes Poor Rear Dash Cam Placement and Obstructed Views
A bad mounting position usually stems from rushing the installation without testing the rear window's operational limits. Rear windshields face far more environmental abuse and optical challenges than front windshields, from built-in electronics to accumulated road spray.
The Fatal Flaw of Missing the Wiper Sweep Zone
Modern aerodynamics on crossovers, SUVs, and hatchbacks pull a vacuum behind the vehicle, sucking dirt, salt, and water droplets directly onto the rear glass. If your rear dash cam sits outside the wiper blade's cleaning radius, you will record nothing but distorted blur within five minutes of driving in bad weather.
- The Dry-Glass Trap: Setting the camera position while parked in a dry garage makes any high spot look clear. You must run the rear washer to physically see where the blade stops.
- Edge Distortions: Sticking the camera in the extreme top corners away from the wiper leads to severe fisheye distortion and missed lane coverage.
- Wiper Arc Variations: Left-pivot and right-pivot rear wipers create asymmetrical sweep zones; always favor the top center of the glass where the blade reaches its highest vertical arc.
Defroster Grid Lines and Dot Matrix Distortion
Rear windshields feature embedded thermal defroster lines and black ceramic frit (the dot matrix border). Placing your adhesive mount or camera lens across these elements introduces severe recording defects.
- Lens Splitting: If a copper heating filament runs horizontally across the center of your camera lens, it creates a split image and catches oncoming headlights, producing blinding vertical glare at night.
- Dot Matrix Adhesion Failure: Mounting an adhesive pad over textured ceramic frit creates micro-air pockets. The mount will inevitably drop when cabin temperatures cycle between summer heat and winter freezing.
- Interior Trim Shadows: Tucking the camera too far up into the headliner trim can cause the plastic housing to cut off the top 15% of your recorded frame.
How to Position Your Rear Dash Cam Like a Pro: A Practical Walkthrough
Installing a rear dash cam provides crucial visual evidence in rear-end collisions, hit-and-run incidents, and parking lot mishaps. However, placing the camera in the wrong location can leave you with blurry footage, obstructed viewing angles, damaged defroster lines, or compromised curtain airbags. This guide walks you through the precise steps to locate, mount, and calibrate your rear dash camera for crystal-clear footage and long-term reliability.
Step 1: Map the Wiper Sweep Zone and Window Geometry
What you need: Rear windshield wiper control, painter's tape, and a tape measure.
Instructions: If you drive an SUV, hatchback, wagon, or crossover equipped with a rear wiper, activate the wiper to observe the cleared arc on the glass. You must place your rear camera lens within this wiped path; otherwise, rain, road grime, and salt spray will obscure your footage within minutes of driving in bad weather. For sedans without a rear wiper, measure the horizontal center of the rear window and locate a spot approximately 2 to 3 inches below the top trim. Mark the preliminary installation boundaries on the exterior side of the glass using painter's tape so you can easily reference them from the inside cabin.
Pro Tip: On sedans, never place the camera on the lower rear deck or near the bottom edge of the glass, as high trunk lids and elevated parcel shelves create large blind spots that hide following vehicles.
Step 2: Clean and Decontaminate the Glass Surface
What you need: Isopropyl alcohol (70% or higher), two microfiber towels, and an ammonia-free glass cleaner.
Instructions: Vehicle interiors accumulate greasy off-gassing films from dashboard plastics, vape vapor, and ambient humidity, all of which prevent adhesives from bonding permanently. First, spray the interior glass with your ammonia-free cleaner and wipe it dry with a microfiber towel to remove heavy grime. Follow this with a thorough wipe using isopropyl alcohol on a clean section of microfiber cloth, scrubbing the exact 4-inch by 4-inch area where the camera bracket will stick. Allow the surface to evaporate and air-dry completely for 3 minutes without touching it with your bare fingers, which leave behind natural oils.
Pro Tip: Avoid ammonia-based cleaners like standard household Windex if your rear glass has aftermarket window tint, as ammonia chemically degrades tint films and causes purple discoloration or bubbling.
Step 3: Power Up the Unit and Check the Live Perspective
What you need: Dash cam power source, rear camera extension cable, and a connected smartphone app or front dash cam LCD display.
Instructions: Temporarily plug your rear camera into the front master unit and power the system on before applying any adhesive. Hold the rear camera against the marked location inside the glass using low-tack painter's tape. Open the live view on your screen or mobile application to check the horizon framing. Adjust the vertical position so that the ground and road account for roughly 60% of the display, with the remaining 40% reserved for the sky. Ensure that interior headrests, high-mounted third brake lights, and rear seatbelts do not cut into the camera’s horizontal field of view.
Pro Tip: Angle the lens roughly 5 to 10 degrees downward from a dead-flat horizontal plane. This downward pitch prevents following car headlights from blinding the image sensor during nighttime driving.
Step 4: Navigate Defroster Grids and Apply Static Cling Film
What you need: Electrostatic windshield sticker (included with most modern dash cams) and a plastic squeegee card.
Instructions: Inspect the horizontal copper heating traces of your rear defroster grid. Never place industrial adhesive tape directly over a defroster line, as removing the mount later can rip the copper wire off the glass and permanently break your defroster. Center the camera lens directly in the clear space between two horizontal heater wires. Before sticking the camera mount, apply a clear electrostatic sticker to the clean glass. Smooth out all micro-air bubbles with a plastic card from the center outward to create a secure, bubble-free foundation that allows tool-free removal later without damaging the glass or tint.
Pro Tip: If your camera's mounting pad is taller than the spacing between heating lines, align the top edge of the pad immediately beneath a line rather than spanning across it.
Step 5: Mount the Bracket and Apply Bonding Pressure
What you need: 3M VHB adhesive pad, mounting bracket, and a hair dryer (if working in temperatures below 60°F / 15°C).
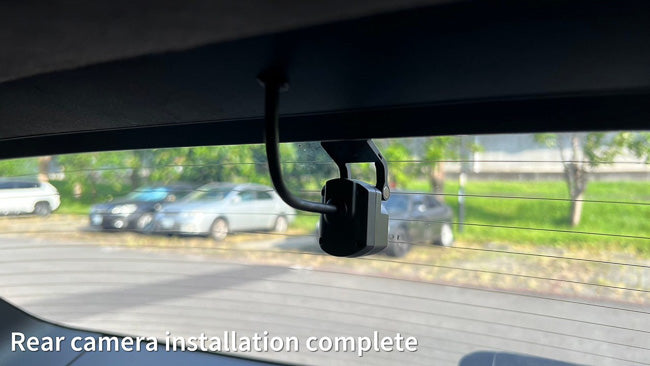
Instructions: Peel the protective backing from the 3M VHB tape on your rear camera mount. If ambient temperatures are low, warm both the adhesive pad and the inside of the rear window using a hair dryer on low heat for 15 to 20 seconds; warm adhesive flows into glass micro-pores far more effectively. Align the bracket squarely with your target zone on the electrostatic sticker and press firmly. Maintain heavy, uniform thumb pressure across the entire bracket surface for a full 60 seconds without rocking the mount. Allow the adhesive to cure for at least 15 to 20 minutes before snapping the camera body into place.
Pro Tip: 3M VHB adhesive requires dwell time to achieve maximum bond strength—it reaches 50% strength after 20 minutes, 90% after 24 hours, and 100% cure after 72 hours. Do not pull on the cable during installation.
Step 6: Route the Cable Clear of Side Curtain Airbags
What you need: Plastic trim removal tool, silicone spray lubricant, and flexible nylon wire fish tape.
Instructions: For sedans, route the video cable along the edge of the headliner toward the front dash cam, tucking it behind the rubber door weatherstripping. In vehicles equipped with side curtain airbags, always route the wire deep behind the airbag modules (along the metal chassis frame) rather than running it across the front of the airbag deployment path. For SUVs and hatchbacks, route the cable through the flexible rubber accordion grommet that connects the chassis to the rear hatch. Spray a tiny spritz of silicone lubricant inside the rubber boot, feed your wire puller through, and draw the mini-USB or coaxial connector gently through the sleeve to maintain waterproof integrity.
Pro Tip: When routing through a hatchback hinge, form a 2-inch downward "drip loop" in the cable right before the entry grommet so rainwater drops off harmlessly rather than trickling into your vehicle's headliner.
Step 7: Conduct Static Clearance and Night Glare Verification
What you need: Flashlight or secondary vehicle headlights, and vehicle ignition key.
Instructions: Fully open and close the trunk or rear liftgate three consecutive times to confirm that the cable has adequate slack and does not catch on the metal hinges or weather seals. Turn your vehicle's ignition on and inspect the final video feed. Verify whether the camera image is right-side up; if it is inverted, access the dash cam settings menu and select the 180-degree image rotation option. Finally, test the position after dark by having a secondary vehicle pull up behind you with its low beams on to confirm that rear window reflections do not create blinding lens flaring.
Pro Tip: Thoroughly clean the exterior side of your rear window directly in front of the lens. External water spots and road film cause infrared sensors and night-vision algorithms to miscalculate exposure, degrading license plate legibility.
✅ Final Checklist
- The camera lens is centered horizontally and sits entirely inside the rear wiper sweep pattern (or high-center on a sedan).
- The mounting adhesive rests between defroster lines on an electrostatic film without overlapping heating filaments.
- The video cable is routed behind curtain airbags and through factory rubber boots with a functional drip loop.
- Trunk or liftgate movement does not pinch, pull, or stretch the video extension cable.
- The video horizon displays approximately 60% road and 40% sky, with minimal glare from rear headrests or defroster lines.
Important Notes:
- Safety Warning: Never route dash cam cables over the exterior covers of side curtain airbags. In a deployment event, an unanchored cable can turn into a dangerous projectile or prevent the airbag from inflating properly.
- Professional Help: Seek assistance from a professional car audio or 12V automotive technician if you drive a luxury SUV with tight tailgate grommets, complex power liftgate motors, or integrated rear sunshades.
- Time and Cost: DIY installation typically takes between 45 and 90 minutes. Materials (trim tool, alcohol, electrostatic film) cost between $10 and $25, whereas professional installation ranges from $80 to $180 depending on vehicle complexity.
How to Mount a Rear Dash Cam in 5 Step-by-Step DIY Stages
Achieving a reliable installation requires pairing proper optical placement with clean mechanical routing tailored to your vehicle body type.
Stage 1: Map the Wiper Sweep and Live-Test the Video Feed
Turn on your vehicle and trigger the rear windshield wiper using the washer spray to mark the clear glass boundary. Power up your dash cam system and connect your smartphone to view the live video feed. Hold the rear camera against the interior glass by hand to confirm that the entire wiper-swept area covers your blind spots without capturing your own vehicle's roofline or headrests.
Stage 2: Prep the Glass Surface
Clean the designated area thoroughly using a 70% isopropyl alcohol wipe to remove interior vinyl off-gassing films and dust. Wipe in a single direction parallel to the defroster lines to prevent tearing the delicate copper heating traces. Let the glass dry completely for two minutes before applying any mounting hardware.
Stage 3: Apply the Electrostatic Film and Adhesive Mount
Apply a clear electrostatic sticker directly to the bare glass between defroster lines, smoothing out all trapped air bubbles with a plastic trim tool. Peel the 3M VHB adhesive backing on the rear camera bracket and press it firmly against the electrostatic film for 30 seconds. This approach provides an industrial-grade bond while ensuring you can remove the camera later without scraping off your defroster filaments.
Stage 4: Route the Cable Based on Your Vehicle Type
How you run the coaxial or USB-C connection back to the front unit depends strictly on your chassis design:
- Hatchbacks and SUVs: Mount the camera to the top glass of the liftgate. Route the wiring through the factory rubber weatherproof boot (grommet) connecting the liftgate to the chassis. Never pinch the exposed wire across the exterior rubber seal, or rain will leak into your cabin.
- Sedans: Mount the camera at the top-center of the fixed rear window. Route the wire directly into the headliner seam, or tuck it along the fixed rear parcel shelf edge toward the side C-pillar trim panels.
- Trucks: For flat, vertical rear glass (including sliding center windows), mount the camera on the fixed upper glass panel directly adjacent to the sliding frame. Use a short loop of slack so the cable remains unaffected when the window opens.
Stage 5: Calibrate the Vertical Angle
Loosen the camera bracket pivot screw and review your live feed on level ground. Adjust the vertical tilt so the frame captures a balance of 40% sky and 60% ground. Setting the camera too high over-exposes the sensor to daylight, washing out contrast and making trailing vehicle license plates unreadable.
How to Adjust Placement for Hatchbacks, Sedans, and Pickups
Vehicle geometry dictates camera height, cable management, and lens orientation. Automotive engineers design distinct rear window profiles that require tailored mounting strategies.
Hatchbacks and SUVs
Hatchbacks and SUVs feature functional liftgates that flex constantly. Secure installation requires routing the video transmission cable through the factory rubber grommet conduit to prevent wire pinching.
- Open the liftgate fully and locate the top center rubber wiring boot.
- Feed the coaxial camera cable through the weather-sealed boot using silicone spray lubricant.
- Mount the lens directly in the upper wiper sweep zone, leaving 2 inches of service loop slack.
Sedans
Sedans feature fixed rear glass with steep rake angles that trap solar heat. Mount the camera at the absolute top center of the glass directly behind the third brake light housing. Ensure the lens points straight outward without catching the interior reflection of the parcel shelf.
Pickup Trucks
Standard pickup rear windows present vertical glass challenges and sliding center panes. If your truck has a manual or power sliding rear window, follow these specific positioning steps:
- Measure 3 inches to the left or right of the sliding glass boundary frame.
- Adhere the mount to the fixed pane at the highest horizontal defroster gap.
- If vertical glass causes cabin reflection, mount an exterior IP69K-rated camera directly to the high-mount cargo brake light.
What If Visibility Is Still Blocked: Troubleshooting Tint and Defroster Lines
Factory tint, aftermarket ceramic film, and horizontal heating elements cause lens flare, optical distortion, and nighttime noise.
Bypassing Defroster Grid Lines
Automotive defroster grids run copper-ceramic traces spaced roughly 25 to 35 millimeters apart. Placing a camera directly over a defroster line splits the focal plane, causing severe blooming from following headlights.
- Turn on your camera's live Wi-Fi preview on your smartphone screen.
- Adjust the mount vertically until the heating filament sits outside the center optical axis.
- Verify that the heating wire does not cross the middle third of the recorded frame.
Overcoming Dark Window Tint
Factory privacy glass rarely interferes with high-dynamic-range (HDR) sensors. However, aftermarket film with lower than 20% Visible Light Transmission (VLT) severely degrades nighttime capture. To correct this, access the camera settings menu in the mobile app. Manually boost the rear exposure value by +0.7 or +1.0 EV, or select an exposure metering mode focused on the center frame to bypass peripheral shadow clipping.
What If It Still Doesn't Work?
If clear footage remains unattainable after adjusting the angle, apply these structured fallback steps to resolve the failure:
- Clean the optical boundary: Remove residue from the glass using a 70% isopropyl alcohol wipe, as hydrophobic window coatings distort dash cam adhesive and lens focus.
- Install a circular polarizing lens (CPL): Attach a dedicated CPL filter tuned to 580 nanometers to eradicate interior parcel shelf reflections on steeply raked sedan glass.
- Switch to an external waterproof unit: If factory tint exceeds 5% limo darkness, deploy an exterior license-plate or tailgate-handle camera rated at IP68 or higher.
- Schedule certified professional installation: If liftgate wiring or curtain airbag deployment zones prevent secure routing, consult a MECP-certified (Mobile Electronics Certified Professional) technician. Standard 2026 professional installation rates range between $90 and $180 for standard dual-channel systems.
Conclusion
According to verified automotive testing and dash cam manufacturer specifications, optimal rear camera performance relies entirely on high, central mounting within the active wiper sweep. Avoiding defroster filament interference and accounting for window tint ensures clear license plate capture during critical incidents. Complete your setup today by connecting your smartphone via Wi-Fi to test the field of view before permanently applying the high-bond adhesive mount.
❓ Frequently Asked Questions
What is the single best location to mount a rear dash cam?
The top-center position on the inside of the rear windshield provides the highest vantage point and the widest field of view. Positioning the camera here minimizes blind spots from trunk lids and ensures headlights from following vehicles do not flood the sensor.
How do you route the rear dash cam wire safely past side airbags?
Never run the cable straight across the top of doors where side-curtain airbags deploy. Instead, tuck the wire behind the airbag canisters using a trim tool, or run the wire down the door sills along the vehicle floor.
Where should you mount a rear camera on a pickup truck with a sliding rear window?
Mount the camera on the fixed glass section directly adjacent to the sliding panel, or at the top center of the sliding pane if sufficient cable slack is provided. Alternatively, use an exterior waterproof camera mounted above the license plate or third brake light.
Will mounting a camera to the rear window damage after-market tint film?
Adhesive mounts can peel or bubble aftermarket tint when removed. Use an electrostatic sticker on the tinted glass first, then adhere the camera mount to the sticker to protect the film from peeling.
Should the rear dash cam be mounted inside or outside the vehicle?
Standard rear dash cams should always be mounted inside the vehicle to keep them sheltered from moisture, dirt, and vandalism. Only exterior-rated, waterproof backup/dash hybrid cameras should be placed outside near the license plate.
How do you find the right camera angle when installing alone?
Power on the front dash cam unit and open its live Wi-Fi feed on your smartphone before peeling the adhesive backing. This allows you to hold the rear unit against the glass and align the horizon line and road view in real time.



