
How to View Dash Cam Footage Tesla 2026 Step-by-Step Guide
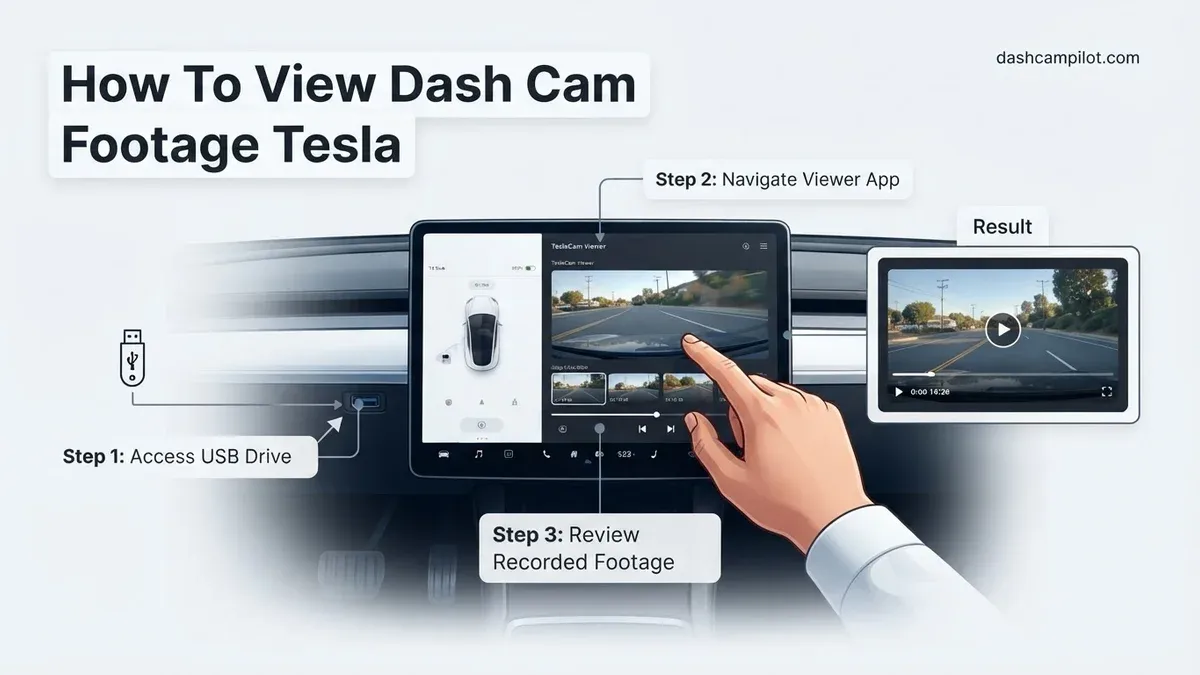
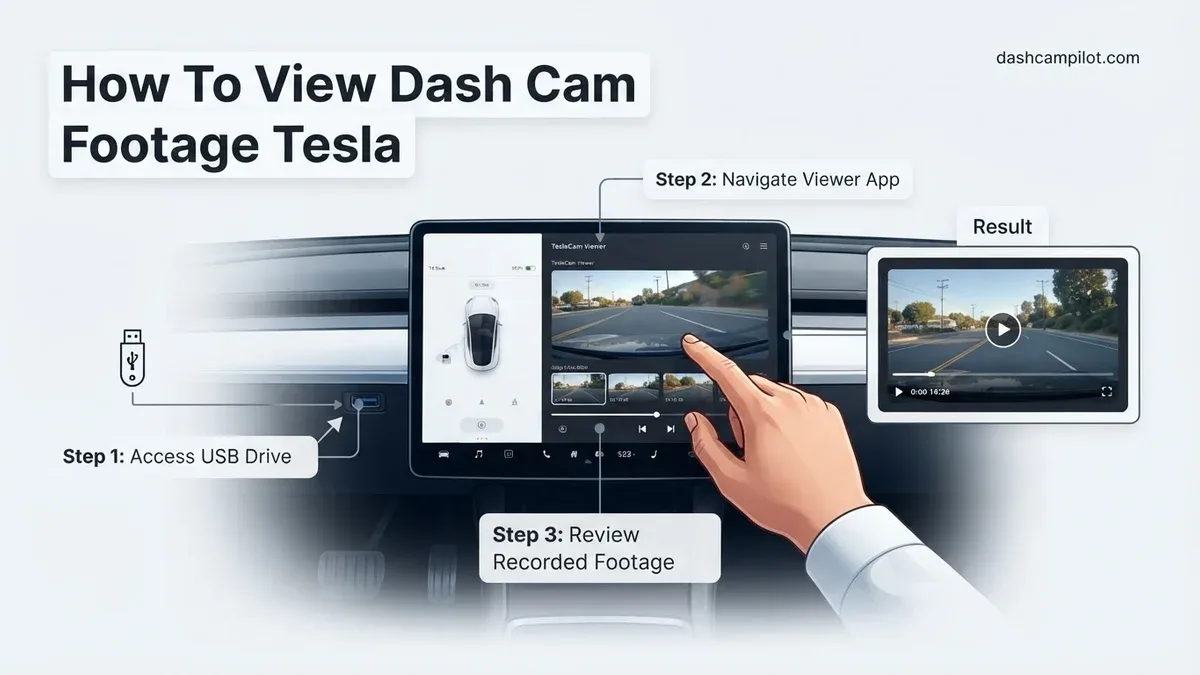
To view Tesla dashcam footage directly, shift your vehicle into Park and tap the Dashcam icon or open the Dashcam app from the app launcher. You can review multi-angle Sentry and driving clips using the built-in touchscreen scrubber, or safely unmount the glovebox USB drive to view files on a computer or smartphone. If clips do not appear, storage formatting and proper recording triggers are usually the culprits.
You can review your Tesla dashcam and Sentry Mode clips directly on the center touchscreen while parked, or eject the glovebox USB drive to view full-resolution files on a computer. In current 2026 Tesla software builds, accessing these video records takes just two taps from your vehicle's app launcher. The built-in media player stitches together synchronized feeds from multiple exterior cameras so you can see every angle simultaneously.
Checking this footage quickly matters in the real world. Whether you need to inspect a parking lot door ding, prove liability after a collision, or check why Sentry Mode flashed its lights, prompt review is vital. Acting fast prevents critical clips from being overwritten by the rolling continuous buffer or lost to storage exhaustion.
Key Takeaways
- Shift your Tesla into Park before accessing the built-in Dashcam touchscreen viewer application.
- Safely unmount the USB drive from Controls > Safety before removing it from the glovebox.
- Footage is organized on the drive under TeslaCam in RecentClips, SavedClips, and SentryClips folders.
- Enable 'Honk to Save' to automatically archive the last 10 minutes of driving video.
- Format your USB drive to exFAT if video playback fails or clips refuse to record.
Diagnosing TeslaCam Storage: How Tesla Records and Organizes Video Files
Your Tesla writes all video data to a single mass-storage device, typically the factory USB drive installed inside the glovebox. The car partitions recordings into three distinct directories inside a root folder named TeslaCam. Knowing how the car segregates these files helps you locate critical footage instantly instead of hunting through dozens of one-minute video blocks.

The Three Core Folders in TeslaCam
- RecentClips: Holds a rolling 60-minute continuous recording buffer broken into one-minute segments. The vehicle continuously overwrites the oldest minute unless an event triggers a permanent save.
- SavedClips: Contains permanent recordings manually triggered by tapping the dashcam icon on your status bar, honking your horn (if enabled in settings), or critical telemetry events detected by safety systems.
- SentryClips: Houses footage generated while the vehicle is locked in Park and monitors nearby threats. Each event folder contains a rolling 10-minute capture leading up to the trigger.
Multi-Angle Video Architecture
Tesla records every individual event across multiple camera streams at once. Each recorded minute creates separate MP4 files for the front wide camera, the rear camera, and both side repeater cameras mounted under the mirrors. On newer vehicle revisions, additional angles such as bumper cameras feed into this synchronized array. Because each camera outputs its own file, using the built-in touchscreen viewer remains the fastest way to view all feeds aligned on a single synchronized timeline.
How to View Tesla Dashcam Footage Like a Pro: A Practical Walkthrough
Tesla vehicles come equipped with a sophisticated multi-camera recording system that acts as both a continuous dashcam and an active security guard through Sentry Mode. Knowing how to efficiently locate, review, and extract this video footage is vital after a traffic incident, parking mishap, or vandalism attempt. This practical walkthrough covers everything from viewing clips directly on your vehicle's center touchscreen to retrieving high-resolution multi-angle files on your computer.
Step 1: Verify Active Recording and Drive Status
What you need: A Tesla vehicle (Model 3, Y, S, or X) running current firmware, and a pre-installed, formatted USB drive plugged into the glovebox port.
Instructions: Before you can review any incident, confirm that your system is actively writing data. Sit in the driver's seat and inspect the status bar at the top or bottom of your touchscreen. Look for the Dashcam icon, which resembles a small camera symbol. A solid red dot on the camera icon confirms the vehicle is currently recording footage to your drive. If the icon shows a gray camera or a small red "x," tap Controls > Safety > Format USB Drive to reinitialize storage, or check that the storage stick is firmly seated in the glovebox USB-A or USB-C connector.
Pro Tip: Never remove the drive while the red recording dot is active. If you drive over rough terrain or notice missing footage, the drive may have momentarily disconnected; consider upgrading to a high-endurance solid-state drive (SSD) rather than a cheap thumb drive.
Step 2: Launch the Integrated In-Car Dashcam Viewer
What you need: Vehicle in "Park" (the native viewer is disabled while driving for safety reasons).
Instructions: Bring your vehicle to a complete stop and press the gear stalk button to engage Park. If you have the Dashcam icon pinned to your lower app tray, simply tap it once to launch the viewer. Alternatively, tap the three dots (App Launcher icon) on the main touchscreen strip, scroll through your applications, and select the Dashcam app (often labeled as "Viewer" on newer software builds). The display will dim slightly and switch to the native playback interface, displaying thumbnail previews of your recently captured video events along the left-hand column.
Pro Tip: If you tap the camera icon while driving, the system does not open the viewer; instead, it saves the preceding 10 minutes of driving footage to the permanent storage folder.
Step 3: Filter Footage by Dashcam, Sentry, or Recent Clips
What you need: The native Dashcam Viewer interface open on the touchscreen.
Instructions: At the top of the viewer menu, locate the categorization tabs: All, Sentry, and Dashcam. To review a traffic event, near-miss, or road obstacle that occurred while driving, select the Dashcam tab. If you are reviewing a parking lot ding, suspicious pedestrian, or break-in alert, tap the Sentry tab. The list displays clips sorted chronologically by timestamp and date. Tap on any entry from the scrollable list; the viewer will immediately load the clip and begin playing back the recorded sequence.
Pro Tip: Look for yellow or red marker dots along the event thumbnail preview or timeline; these markers indicate the exact second Sentry Mode detected a physical impact or close-proximity motion.
Step 4: Scrub the Timeline and Switch Camera Angles
What you need: An active clip playing inside the Tesla Viewer.
Instructions: When a clip starts playing, the main screen highlights the primary forward-facing camera, flanked by smaller thumbnail windows representing the rear camera and both left and right fender (repeater) cameras. Tap any of the smaller camera thumbnails to swap it into the primary viewing frame, allowing you to clearly see blind-spot activity or license plates beside your vehicle. Drag your finger across the timeline scrubber bar at the bottom to fast-forward or rewind. Jump directly to the incident by tapping the small colored event dot placed on the timeline.
Pro Tip: Use the forward and reverse 15-second skip buttons located next to the play/pause control to quickly step through lengthy clips without accidentally skipping past critical split-second details.
Step 5: Safely Eject the Storage Device
What you need: Physical access to the glovebox USB port.
Instructions: If you need to share footage with insurance providers, law enforcement, or post it online, you must transfer the raw video files to a personal computer. To avoid file system corruption, do not yank the drive out directly. On the touchscreen, navigate to Controls > Safety, scroll down, and tap Unmount USB Drive (or press and hold the Dashcam icon on the top bar until the red recording dot turns gray). Once the icon indicates the drive is safely unmounted, open the glovebox and unplug the drive.
Pro Tip: Unplugging a flash drive while Tesla's Linux operating system is actively writing a 1-minute video chunk can permanently corrupt the entire partition table, wiping prior recordings.
Step 6: Open and Organize Video Files on Your Computer
What you need: A Mac or Windows PC with a compatible USB port or adapter, and a modern media player like VLC Media Player.
Instructions: Insert your storage drive into your computer and open the file explorer. Locate the main partition and double-click the directory named TeslaCam. Inside, you will see three distinct subfolders: RecentClips (a rolling 60-minute loop of temporary driving video), SavedClips (manually saved dashcam events), and SentryClips (motion and alarm triggers). Open the target event folder. Each event consists of multiple 1-minute MP4 video files recorded simultaneously from individual perspectives: front.mp4, back.mp4, left_repeater.mp4, and right_repeater.mp4.
Pro Tip: Use free third-party desktop utilities like "TeslaCam Viewer II" or "SentryView" to automatically synchronize and play all four camera angles side-by-side in real-time, just like the in-car touchscreen does.
✅ Final Checklist
- Confirm the Dashcam icon shows a solid red dot prior to every drive to ensure continuous recording.
- Verify the vehicle is in "Park" before attempting to review recorded clips on the primary center console.
- Check all four camera perspectives (Front, Rear, Left Repeater, Right Repeater) for complete accident context.
- Always trigger the software "Unmount" command before physically disconnecting the drive from the glovebox.
- Back up critical accident files from the
SavedClipsfolder to cloud storage or your local hard drive immediately.
Important Notes:
- Storage Longevity: Standard thumb drives degrade rapidly under heavy dashcam write cycles. Replace generic flash drives with an endurance-rated MicroSD card inside a USB adapter, or a dedicated external Solid State Drive (SSD) rated for 500 MB/s write speeds.
- Evidence Preservation: If you are involved in a collision, tap the Dashcam icon immediately or honk the horn (if enabled in settings) to prevent crucial footage from being overwritten by the rolling 60-minute buffer.
- Estimated Time and Cost: In-car viewing takes less than 2 minutes. Desktop extraction takes approximately 5 to 10 minutes. Zero cost if using factory equipment; upgraded endurance storage drives range from $25 to $90.
Step-by-Step Guide: How to View Dash Cam Footage on the Tesla Touchscreen
The native touchscreen viewer is your primary tool for quick reviews on the go. You do not need adapters, cables, or third-party software to see what happened around your car. The interface lets you scrub footage, jump straight to impact alarms, and switch primary angles on the fly.
Accessing the In-Car Dashcam Viewer
- Shift into Park: Press the Park button on your gear stalk or drive strip. For safety reasons, Tesla locks video playback while the vehicle is in Drive or Reverse.
- Open the App Launcher: Tap the three-dot grid icon located on the bottom dock of your main display.
- Launch Dashcam: Select the Dashcam application icon (a stylized camera containing a red recording dot). If pinned to your favorites bar, you can tap it directly.
- Filter Your Clips: Tap the filter tabs at the top left of the viewer window. Choose All, Sentry, or Dashcam to quickly narrow down your target recording.
Navigating Multi-Camera Views and the Video Scrubber
Once you select an event from the left-hand thumbnail list, the player loads the synchronized camera angles into a quadrant layout on your screen. The largest viewport displays your main forward camera, framed by smaller panels showing your rear and side repeater feeds.
- Switch Main Angles: Tap any of the smaller camera thumbnails to swap that perspective into the primary viewing frame immediately.
- Identify Sentry Triggers: Look for a distinct red dot on the horizontal scrubber bar. Tesla automatically marks the exact second the proximity or physical sensor triggered the alarm, saving you minutes of tedious scrubbing.
- Control Playback Speed: Tap the playback speed toggle (1x, 1.5x, 2x) to fast-forward through uneventful footage, or use the 15-second skip buttons to move along the timeline.
- Delete Unwanted Media: Tap the trash can icon in the bottom-right corner to delete the active clip permanently, freeing up space for future recordings.
How to View Dash Cam Footage on a Computer or Phone via USB
Removing the USB drive from your Tesla allows you to view multi-angle recordings simultaneously on a larger screen. It also enables high-resolution exporting for insurance claims.
Safely Unmounting and Removing the Drive
- Open the vehicle controls on your touchscreen and select the Safety menu.
- Scroll to the Dashcam section and tap the icon to pause recording, or press and hold the Dashcam icon on the main app bar until the red recording indicator turns grey.
- Wait at least 10 seconds to allow the system to clear active write buffers to the storage media.
- Open the glovebox and unplug the USB flash drive or solid-state drive from the dedicated port.
Accessing Files on PC, Mac, or Mobile Device
- Insert the drive into your computer or connect it to an iPhone or Android device using a compatible USB-C adapter.
- Open the root directory labeled TeslaCam to view three primary subdirectories: RecentClips, SavedClips, and SentryClips.
- Locate footage organized into chronological minute-long files containing separate video streams: front, back, left repeater, and right repeater.
- Play files using standard media software such as VLC, or use specialized web-based TeslaCam viewers that synchronize all four camera feeds into one synced layout.
What to Do If Dash Cam Footage Is Missing, Corrupted, or Won't Play
Unsynchronized write cycles and sudden drive disconnections frequently lead to corrupt video headers or skipped files in TeslaCam archives.
Fixing Corrupted MP4 Files and File System Errors
- Connect the drive to a PC or Mac rather than troubleshooting directly inside the vehicle.
- Run a native disk repair tool, such as chkdsk /f on Windows or Disk Utility First Aid on macOS, to fix fragmented sectors.
- Repair unreadable MP4 clips using free open-source utilities like Untrunc, which reconstruct damaged file headers using a working video clip from the same drive.
Recovering Overwritten or Deleted TeslaCam Clips
- Disconnect the drive immediately after an incident occurs to stop the vehicle's rolling 60-minute buffer from overwriting the memory sectors.
- Download dedicated data recovery software, such as Recuva, Disk Drill, or PhotoRec.
- Perform a deep scan on the exFAT partition to reconstruct recently deleted or flushed
.mp4containers before new files overwrite them.
What If It Still Doesn't Work?
If software repairs and computer readers fail to detect your Tesla dashcam clips, follow these escalating fallback procedures to resolve hardware or vehicle-level faults:
- Reformat the drive inside the Tesla: Navigate to Controls > Safety > Format USB Drive. This process cleans partition tables and prepares the storage volume to the required exFAT structure.
- Upgrade your storage media: Consumer thumb drives quickly overheat under continuous HW4 and AI4 multi-camera writes. Replace failing flash drives with an automotive-grade solid-state drive or high-endurance microSD card capable of sustained sequential writes exceeding 30 MB/s.
- Perform a hard system reboot: Press and hold both steering wheel scroll buttons simultaneously for 10 to 15 seconds until the central touchscreen restarts, re-initializing the internal USB host controller.
- Schedule a Tesla Service visit: If the glovebox USB port fails to supply data connectivity or power, the internal hub assembly may require replacement. Certified service repairs for faulty glovebox USB ports typically cost between $150 and $350 out-of-warranty.
Conclusion
According to verified automotive research and Tesla engineering documentation, managing dashcam footage requires strict adherence to proper drive-unmounting protocols and high-speed write hardware. Reviewing clips through the cabin Touchscreen Viewer offers quick incident verification, while desktop tools provide full multi-angle inspection. To avoid lost evidence during an unexpected collision, inspect your storage drive health monthly and verify that dashcam recording remains actively illuminated on your primary status bar.
❓ Frequently Asked Questions
Why is my Tesla Dashcam icon grayed out or showing an X?
A grayed-out icon or red X indicates the drive is either disconnected, full, corrupt, or improperly formatted. Check that the drive is plugged securely into the glovebox port and format it via Controls > Safety > Format USB Drive if necessary.
How do I safely eject the USB drive from my Tesla?
Navigate to Controls > Safety on your touchscreen and press and hold the Dashcam icon until it pulses and grays out, or select 'Unmount USB'. Unmounting prevents file corruption before you physically pull the drive from the glovebox.
What is the difference between RecentClips, SavedClips, and SentryClips?
RecentClips continuously buffers the last 60 minutes of driving and overwrites old data automatically. SavedClips contains footage you intentionally saved manually or via honking, while SentryClips stores proximity and alarm triggers captured when Sentry Mode was active.
How can I ensure critical incidents are saved automatically while driving?
Go to Controls > Safety > Dashcam and choose 'Auto' to automatically save footage when safety events like airbag deployment occur. You should also toggle on 'Honk to Save' so tapping your horn instantly captures and protects the preceding 10 minutes of video.
Why does my Tesla touchscreen say 'Dashcam Viewer Unavailable'?
This notification occurs if the vehicle is not in Park or if the infotainment system is actively writing data or rebooting. Place the car in Park, wait a few seconds, and if the error persists, perform a touchscreen soft reboot by holding both scroll wheels.
How do I format a new or corrupted USB drive directly in the vehicle?
Insert the USB drive into the glovebox port, open the touchscreen menu, and go to Controls > Safety. Scroll down to find and select 'Format USB Drive', which automatically configures the storage to exFAT with the required TeslaCam directory.



