
How to Know If Dash Cam Is Recording Proven 2026 Guide
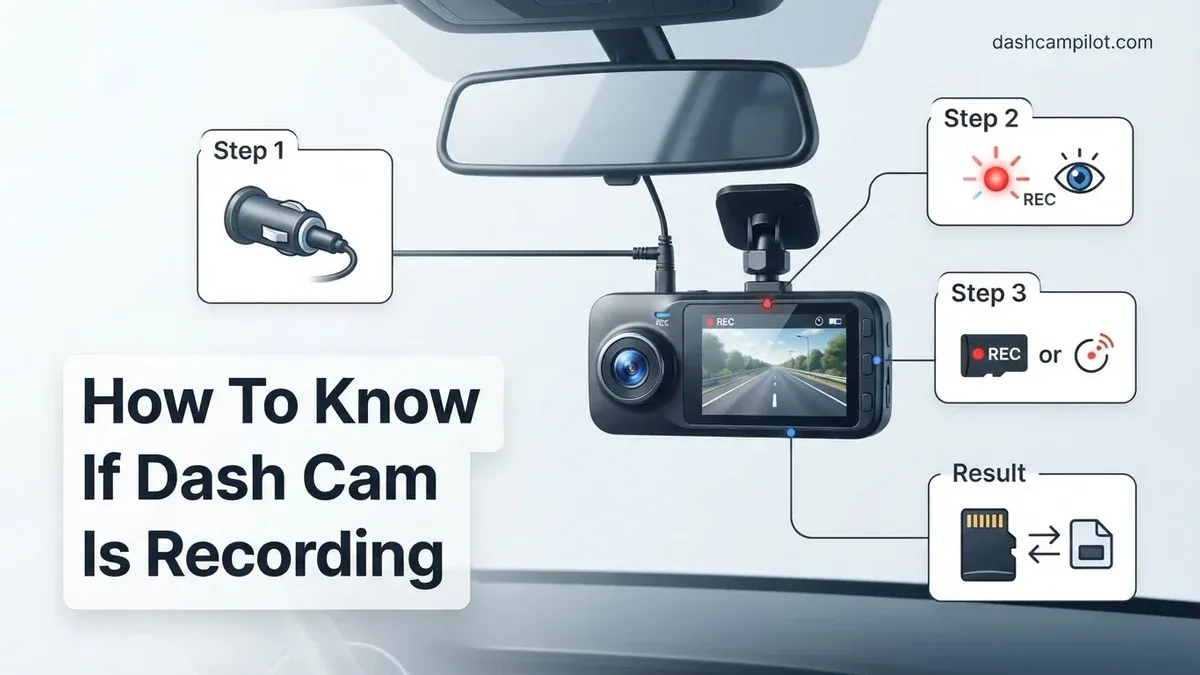
Your dash cam is actively recording if you see a steadily blinking LED indicator (typically red or blue), a flashing "REC" icon on the display, or an advancing timestamp counter. Modern dash cams also emit an audible startup chime or voice prompt confirming that continuous loop recording has initialized. If the screen is black, look specifically for a flashing physical status light near the lens or housing edge.
Confirming active recording matters because a powered-on camera does not guarantee saved footage. A loose power cable, failed memory card, or corrupted file allocation table can keep your dash cam lit up while failing to write a single byte of video. Recognizing true capture signals protects you from discovering an empty memory card right after a critical accident.
Key Takeaways
- A flashing red or blue LED confirms regular active recording on most dash cams.
- A solid status light usually signifies standby mode, a system freeze, or card failure.
- Screen shutoff is standard screen-saver behavior; check status lights to ensure recording continues.
- Verify your live feed instantly using the companion mobile app over built-in Wi-Fi.
- Format memory cards monthly to prevent undetected write errors and memory lockups.
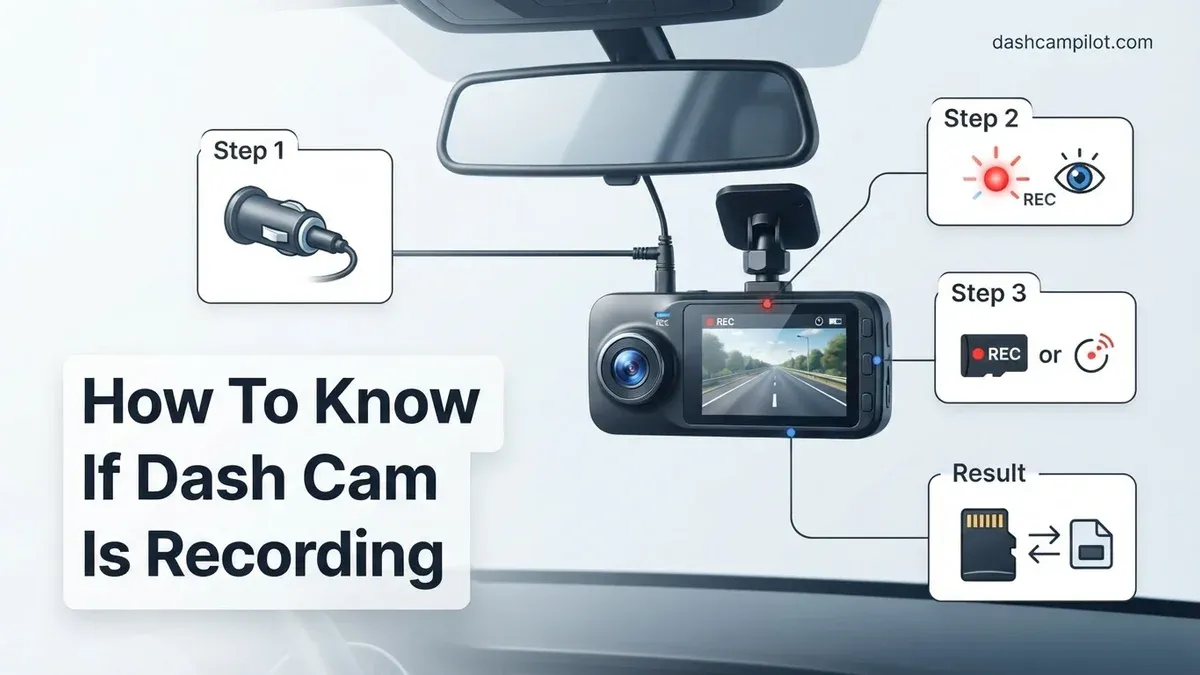
Diagnosing Dash Cam Recording Indicators: Lights, Sounds, and Screens
Manufacturers design dash cams to provide quick visual and acoustic cues so you can confirm operation without taking your eyes off the road for long. Here is how to decode what your camera is telling you while you drive.

Visual Signals: LEDs, Icons, and Live Timers
Physical and on-screen cues provide immediate proof of video capture. Depending on whether your unit has an LCD screen or a stealth, screenless design, observe the following visual markers:
- Flashing Red or Blue Status LED: A slow, rhythmic pulse (usually once per second) indicates active file writing to the microSD card. A solid, non-blinking red light often indicates standby mode, an idle state, or an unformatted storage card.
- Flashing "REC" or Pulsing Red Dot: For screen-equipped dash cams, look at the upper-left or upper-right corner. A pulsing dot or blinking "REC" text confirms the video encoder is processing footage.
- Advancing Running Timestamp: Watch the seconds counter on the display overlay. If the timer ticks upward (e.g., 14:02:11 to 14:02:12), the stream is live. If the numbers freeze, the camera software has locked up.
- Screen Saver Behavior: Most units turn their displays off automatically after 30 to 60 seconds to prevent driver distraction. If the screen goes dark, do not assume it stopped. Check the edge LED; it should continue blinking while the panel sleeps.
Auditory Cues and Voice Prompts
Modern dash cams rely heavily on audio alerts to keep drivers informed without requiring visual checks. These sounds deliver instant diagnostic feedback the moment your vehicle starts.
- Voice Prompts: Units from brands like VIOFO, Thinkware, and BlackVue feature clear spoken messages such as "Continuous recording started" or "Recording normal driving."
- Ascending Startup Chimes: A crisp two-to-three-tone ascending beep confirms that power is stable and storage initialization was successful.
- Repetitive Error Beeps: Rapid, continuous chirping or a low-tone double beep signals a malfunction. This typically means the dash cam cannot detect the memory card or has encountered a write speed error.
How to Verify Dash Cam Recording Like a Pro: A Practical Walkthrough
Dash cams are designed to operate silently in the background, but silent operation often creates dangerous uncertainty. A loose 12-volt plug, a failed memory card, or corrupted firmware can cause your dash cam to stop recording without any obvious warning, leaving you completely unprotected when an accident happens. Following this practical walkthrough ensures your dash cam is actively capturing, encoding, and saving reliable footage every time your vehicle hits the road.
Step 1: Decode the Physical LED Status Indicators
What you need: Vehicle ignition switched on, direct line of sight to the camera housing, and your manufacturer’s LED status chart.
Instructions: Start your vehicle to deliver power to the unit and observe the dedicated LED indicators on the camera chassis. Brands like VIOFO, Thinkware, and BlackVue use specific lighting behaviors to convey device operational status. A steady or slowly pulsing red or blue light (flashing once every 1.0 to 1.5 seconds) almost universally signifies normal, continuous recording. Conversely, an LED that flickers rapidly (3 to 4 times per second) indicates a microSD write failure, while a solid red light on some models indicates standby or paused recording rather than active capture. Match the color and flashing cadence against your model's quick-start reference guide to confirm nominal operation.
Pro Tip: Never mount the dash cam directly behind dark windshield tint strips or sunshade dots (frit) that conceal the status LEDs from your normal driving seated position.
Step 2: Inspect the Live On-Screen Display (OSD) and Timestamps
What you need: Dash cam equipped with a built-in LCD or OLED display screen (such as Nextbase or Garmin models).
Instructions: If your camera has a screen, wake it up by momentarily pressing any physical button. Look closely at the top-left or top-right corner of the active view. You should see a pulsing red circle icon or a red "REC" label. Next, shift your attention to the running timecode overlay, which displays hours, minutes, and seconds (HH:MM:SS). Watch this counter for at least 5 consecutive seconds. If the seconds counter is advancing continuously in real time, the camera processor is actively encoding video frames to the hardware buffer. If the timecode is frozen or displays an error banner such as "SD Error" or "No Card," the unit has halted recording.
Pro Tip: Modern dash cams activate a screensaver after 30 to 60 seconds of driving to comply with distracted driving laws; tap the power button once lightly to check the display without powering the unit down.
Step 3: Listen for Acoustic Feedback and Voice Prompts
What you need: A quiet vehicle cabin with the vehicle parked and the radio turned off.
Instructions: Turn the vehicle ignition from the "Off" position to "Accessory" or "Start" and listen carefully for the unit's startup cycle. Quality dash cams provide auditory cues to confirm system health. For instance, VIOFO models emit a series of three ascending beeps, while BlackVue and Thinkware cameras broadcast spoken voice prompts such as "Continuous recording will now start." If the unit experiences a memory card malfunction, a lens obstruction, or a power deficit, it will emit a repeating high-pitched alarm chime or announce "Check SD card" or "Card formatting required." Hearing the correct boot sequence confirms the system has transitioned into write mode.
Pro Tip: Enter the dash cam's system settings menu to set the audio prompt volume to maximum (80% to 100%) so you can hear failure warnings over road and engine noise.
Step 4: Audit the Live Stream via the Mobile Companion App
What you need: Smartphone running the dash cam's official mobile application (e.g., VIOFO App, BlackVue App, Garmin Drive) and Wi-Fi enabled.
Instructions: Turn on the camera's internal Wi-Fi broadcast button, open your smartphone's Wi-Fi menu, and connect to the dash cam's network (typically broadcasting on a 2.4 GHz or 5.0 GHz channel). Launch the companion app and tap the "Live View" tab. Verify that the video stream displays your vehicle's current surroundings smoothly at 30 or 60 frames per second without stuttering. Then, navigate to the app's internal "File Browser" or "Driving Files" folder. Refresh the file directory to confirm that new 1-minute, 3-minute, or 5-minute video chunks are generating in real time with the current date, time, and correct file size.
Pro Tip: If your phone automatically disconnects from the dash cam Wi-Fi, turn off mobile cellular data in your phone's quick settings, as phones often reject Wi-Fi networks that lack external internet access.
Step 5: Trigger a Manual Emergency Lock Event
What you need: Accessible camera emergency/lock button (marked with an exclamation point, triangle, or camera icon).
Instructions: While the camera is running, press the manual "Emergency File Lock" button on the casing, or simulate a minor impact by firmly tapping the windshield glass adjacent to the mount with your knuckle. A functional dash cam will acknowledge this input instantly by sounding a distinct single-tone chime or displaying a yellow padlock icon on the display screen. This action tests whether the internal processor is running, whether the G-sensor is responding to physical shock thresholds, and whether the system can successfully transfer video files from the temporary circular buffer into the protected, non-overwritable "RO" (Read-Only) or "Event" storage directory.
Pro Tip: Avoid hitting or twisting the camera body directly during this test to prevent cracking the adhesive mount or knocking the lens out of vertical alignment.
Step 6: Remove and Verify MicroSD Files on a Computer
What you need: High-speed USB microSD card reader, desktop or laptop computer, and VLC Media Player (free media player software).
Instructions: Turn off your vehicle ignition, wait 10 seconds for the camera's internal supercapacitor to safely close the active video file, and eject the microSD card. Insert the card into your computer's USB reader and open the file explorer. Navigate to the root directory (often labeled "/DCIM/" or "/Normal/"). Sort all files by "Date Modified." Confirm that the newest files reflect your most recent drive within the last few minutes. Verify that the file sizes are substantial (typically 250 MB to 550 MB per 3-minute clip for 1440p or 4K video). Double-click to play 2 or 3 clips in VLC Media Player to verify clear video rendering, fluid frame rates, and functional synchronized cabin audio.
Pro Tip: If your files show a file size of 0 KB, fail to play, or default to a generic timestamp from the year 2000, your memory card has degraded to a permanent read-only state and must be replaced immediately.
Step 7: Verify Parking Mode Transition and Power Draw
What you need: Hardwire kit with 3-wire connectivity (constant battery line, accessory/switched line, and vehicle ground) or an OBD-II power cable.
Instructions: Shut off your vehicle's engine, remove the ignition key, and close the doors while remaining inside the vehicle. Observe the dash cam for 30 to 90 seconds. Once the switched ACC circuit drops to zero volts, a properly configured hardwired dash cam will change state, either by voice-announcing "Entering parking surveillance mode" or by shifting its LED from a steady burn to a slow, periodic pulse. Step out of the car, lock the doors, and walk across the front of the vehicle to trigger motion or radar detection. Return to the vehicle, cycle the ignition on, and confirm that the unit reports new parking events or displays a recorded alert notification.
Pro Tip: Verify that the low-voltage cutoff switch on your hardwire kit box is set to at least 12.0V or 12.2V to prevent the camera from draining your car starter battery overnight.
✅ Final Checklist
- LED status light displays the steady or slowly pulsing pattern designated for active recording.
- The LCD/OSD screen displays a flashing red "REC" indicator and an advancing second-by-second timecode.
- The camera plays an audible confirmation tone or voice prompt upon engine ignition without reporting storage errors.
- Emergency manual lock buttons or knuckle taps successfully save footage into the protected event directory.
- Computer inspection reveals valid, non-zero-byte video files with current timestamps and smooth audio-video playback.
Important Notes:
- Hardware Warnings: Never remove or insert a microSD card while the camera is actively powered on. Doing so can corrupt the file allocation table (FAT32/exFAT) and permanently ruin the flash memory sectors.
- Card Maintenance: Consumer-grade SD cards deteriorate rapidly under constant overwriting. Use only "High Endurance" MLC or TLC cards (such as SanDisk High Endurance or Samsung PRO Endurance) and format the card inside the camera every 30 to 60 days.
- When to Seek Help: If your camera shuts down unexpectedly, drains your car battery, or fails to enter parking mode after hardwiring, consult a certified automotive 12-volt mobile electronics technician (MECP-certified) to check fuse tap connections.
- Estimated Time and Cost: Performing this diagnostic audit takes approximately 10 to 15 minutes. Replacing a degraded memory card with a high-endurance 128 GB card costs roughly $15 to $25.
Step-by-Step Procedure to Test and Confirm Active Dash Cam Recording
When indicator lights leave you uncertain, use secondary verification methods to eliminate guesswork. Testing the camera through its wireless interface or directly via the memory card confirms that complete, playable video files are actually being generated.
Method 1: Checking Live Stream via Smartphone App
Nearly all current dash cams feature 5GHz Wi-Fi or Bluetooth pairing for mobile connectivity. You can test active recording inside the vehicle in under two minutes:
- Keep your car running so the camera receives full accessory power.
- Open the dash cam's dedicated mobile app on your smartphone and connect to the camera's Wi-Fi network.
- Navigate to the live feed screen. Confirm the app displays a running stream with an active red recording badge.
- Wave your hand in front of the lens to check for immediate motion response on your phone screen.
- Check the media gallery. Look for newly created 1-minute or 3-minute video files showing the current date and time. Note that some units pause loop recording while you browse the file library, so exit the gallery once verified.
Method 2: Performing a MicroSD Card Audit on a Computer
The definitive way to confirm active recording is to inspect the raw file structure on a computer. This eliminates display anomalies or software reporting errors.
- Turn off your vehicle's engine and wait for the camera to shut down completely before ejecting the microSD card.
- Insert the card into an SD card reader connected to your PC or laptop.
- Open the drive directory (typically named
DCIMorCARDV) and access the/Normalor/Drivingfolder. - Sort the files by "Date Modified." The latest clip should correspond exactly to the minute you turned off the engine.
- Play the newest clip using a media player like VLC. Check that the file plays smoothly, contains synced audio, and does not show an error of 0 KB file size.
What Causes a Dash Cam to Stop Recording and How to Fix It
Modern dash cameras rely on delicate synchronization between local power, logic boards, and continuous storage read-write cycles. When one component falters, recording halts automatically to protect hardware integrity.
Resolving MicroSD Card Corruption and Formatting Issues
Memory card failure accounts for over 80% of unrecorded incidents according to automotive diagnostic data. Dash cams utilizing high-bitrate 4K sensors in 2026 demand sustained write speeds. Standard consumer cards burn through their write cycles rapidly under heavy loop recording.
- Power down the dash cam and eject the MicroSD card safely.
- Inspect the card for thermal warping or gold contact oxidation.
- Insert the card into a computer and back up any critical footage.
- Format the card to exFAT or FAT32 depending on manufacturer specifications, or run a low-level format using the official SD Card Formatter tool.
- Reinsert the card into the dash cam and format it once more through the device's native setup menu.
Managing G-Sensor Sensitivity and Storage Lockout
Internal accelerometers (G-sensors) automatically protect footage during hard braking or impacts. When calibrated too high, everyday road bumps flag harmless files as emergency events. Dash cams will not overwrite protected files, causing memory exhaustion and halting recording.
- Enter the device settings menu via the integrated screen or associated mobile application.
- Navigate to the G-Sensor or Impact Detection sensitivity menu.
- Lower the sensitivity setting from "High" to "Low" to avoid false incident locks.
- Format the storage drive to clear accumulated, locked emergency files that occupy maximum capacity.
What If It Still Won't Record: Advanced Fallback Troubleshooting
If routine maintenance fails to trigger active recording, deeper electrical or system-level issues may be shutting down the unit prematurely. Execute these targeted diagnostic steps to restore functionality:
- Reflash the firmware: Download the latest 2026 firmware directly from the manufacturer. Corrupted device operating systems frequently fail write-verification protocols, dropping active recording routines.
- Bypass the vehicle hardwire kit: Disconnect permanent fuse taps and power the camera using the factory 12V cigarette adapter and original USB cable. Faulty low-voltage cut-off modules often shut off current prematurely.
- Test the power delivery with a digital multimeter: Verify that the power harness delivers a stable 5V output at 2.0A to 3.0A. Voltage sags below 4.75V cause instant video write errors.
- Inspect supercapacitor health: If the unit fails to save the final clip when the vehicle ignition turns off, the internal capacitor has degraded and can no longer finalize video containers.
- Seek professional installation repair: Consult a certified 12-volt mobile electronics technician (MECP-certified). Bench testing and electrical rewiring typically cost between $75 and $150.
Conclusion
Ensuring an onboard dash cam records reliably requires verifying visual LED indicators, maintaining adequate file system throughput, and isolating electrical delivery faults. According to verified research and expert automotive electronics sources, regular card formatting every 30 to 60 days prevents the vast majority of silent recording failures. Make a habit of checking your dash cam's status lights every time you start your engine to ensure seamless protection on the road.
❓ Frequently Asked Questions
What should I do if the REC icon is not flashing on the screen?
If the REC symbol or red dot is missing, your camera is likely paused, parked in a menu, or encountering an SD card error. Tap the emergency/record button or restart the unit, and format the microSD card if recording does not resume automatically.
How do I know if my dash cam is recording in parking mode?
In parking mode, the camera typically maintains a slow-pulsing light or stays dark until an impact or motion sensor triggers an event. You can confirm functionality by tapping the vehicle or waving in front of the lens to observe the recording LED trigger.
Why does my dash cam beep continuously while driving?
Repetitive beeping is an error warning that the camera cannot write to the storage media, commonly caused by card corruption or insufficient write speed. It can also signify that the locked emergency file folder is full and requires manual clearing.
Can a bad microSD card look like it is recording when it is not?
Yes, failing or counterfeit cards often switch to a read-only lock where the dash cam appears to function, but no new data is saved. Always inspect your card on a computer to verify that recent clip timestamps match your latest trip.
Does a dash cam keep recording while connected to a phone via Wi-Fi?
Many models temporarily suspend continuous loop recording while an active Wi-Fi connection transfers files or alters system settings. Disconnect the smartphone app after checking your clips so the camera returns to automatic loop recording.
What is the fastest way to confirm my dash cam saved a driving incident?
Pull over safely and open the camera companion app or pull the memory card to inspect it using a mobile card reader. Check the designated 'Event', 'RO' (Read-Only), or 'Emergency' folder to ensure the G-sensor saved the locked clip.



