
How to Format SD Card for Dash Cam Proven 2026 Guide

To format a micro SD card for your dash cam correctly, you must match the card's storage capacity to the file system your camera demands. Cards 32GB or smaller run on FAT32, while modern high-capacity cards (64GB to 512GB) generally utilize exFAT—unless your specific camera requires forced FAT32 formatting. Configuring this correctly ensures your dash cam writes video files continuously without crashing.
Dash cams run demanding, non-stop loop cycles that write, split, and overwrite 4K video files every few minutes. If the file system or cluster size is mismatched, the camera will throw read-write errors, reboot randomly, or fail to save footage during an impact. Formatting your card correctly eliminates these write-speed bottlenecks and guarantees your device captures critical road evidence.
Key Takeaways
- Format directly inside your dash cam first for guaranteed file system compatibility and stability.
- Use FAT32 for cards up to 32GB; verify if 64GB+ cards need FAT32 or exFAT.
- Use GUIFormat on Windows to format 64GB or larger micro SD cards to FAT32.
- Check the physical lock switch on your micro SD adapter if write-protection errors appear.
- Reformat your dash cam memory card every two to four weeks to avoid corrupted loops.

Why Dash Cams Require Specific SD Card Formats (FAT32 vs. exFAT Explained)
Dash cams rely on lightweight real-time operating systems (RTOS) with strict file system parameters. Unlike a smartphone or laptop, a vehicle camera cannot flexibly adapt to an unsupported file architecture. Choosing the right format depends strictly on capacity and manufacturer firmware.
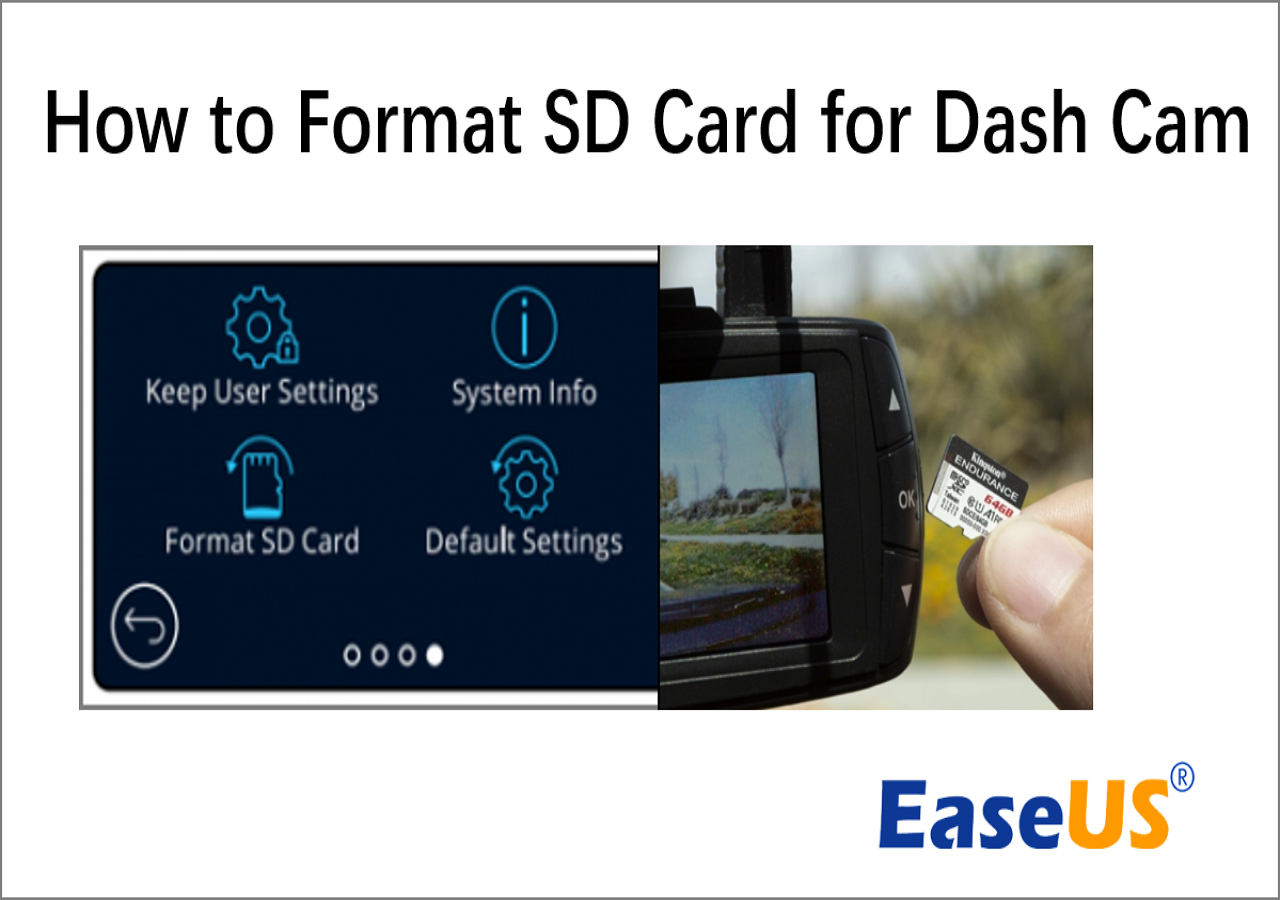
Choosing Between FAT32 and exFAT by Capacity
Your card size dictates its native partition standard under modern SD Association rules:
- 32GB and smaller (SDHC): Standardized to FAT32. Nearly every dash cam on the market reads this format natively with zero configuration headaches.
- 64GB to 512GB (SDXC): Standardized to exFAT. Most premium 2026 dash cams support exFAT out of the box to allow continuous high-bitrate multichannel 4K recording.
- The Manufacturer Exception: Several leading brands (such as Thinkware, VIOFO, and BlackVue) still require 64GB, 128GB, and 256GB cards to be formatted as FAT32 for stability, requiring you to bypass standard operating system limits.
Setting the Correct Allocation Unit Size
The Allocation Unit Size (or cluster size) defines the smallest block of space used to hold a video file. Dash cams constantly write large contiguous video streams rather than thousands of tiny text files. When prompted during a computer format, select 32KB (32,768 bytes) for FAT32 or 128KB for exFAT. Setting the cluster size too small forces the dash cam's processor to manage too many individual blocks, causing buffer overflow and dropped video frames.
Master Dash Cam SD Card Formatting in 7 Simple Steps
Formatting your dash cam's microSD card is the single most effective maintenance task you can perform to prevent corrupted video files, recording freezes, and the dreaded "card error" warning. Dash cams push memory cards to their absolute physical limits with continuous, 24/7 read-and-write overwrite cycles. This guide walks you through every phase of the formatting process—whether you choose to do it directly on your dash cam unit, a Windows PC, or an Apple Mac—ensuring your critical drive footage is reliably captured when you need it most.
Step 1: Back Up Crucial Incident Footage
What you need: A computer, an SD/microSD card reader, and an external hard drive or cloud storage account.
Instructions: Formatting irreversibly wipes every single byte of data from your memory card. Turn off your vehicle, wait 10 seconds for the dash cam to finish writing its final file, and gently eject the card. Insert the card into your computer's card reader. Open the card's file directory and navigate through both the standard recording folder (often labeled "Normal" or "Driving") and the protected directory (commonly labeled "Event", "RO", or "Parking"). Copy all necessary incident clips, scenic drive recordings, or snapshots to a local folder on your computer's internal drive before proceeding. Verify that the files play back smoothly before moving to the next step.
Pro Tip: Never pull the card out while the dash cam's status LED is blinking; doing so can cause an unrecoverable electrical failure in the card's NAND flash controller.
Step 2: Determine Your Dash Cam's Required File System
What you need: Your dash cam user manual or manufacturer technical specification page.
Instructions: Memory cards require a specific file system structure to communicate properly with your dash cam's lightweight embedded firmware. As a standard rule in automotive electronics, cards that are 32GB or smaller rely on the FAT32 file system. Cards that are 64GB, 128GB, 256GB, or larger natively use exFAT. However, many popular dash cam models (such as certain Thinkware, BlackVue, or VIOFO units) strictly require 64GB+ cards to be formatted in FAT32 to enable custom loop-recording protocols. Check your dash cam specifications to verify whether your specific hardware expects FAT32 or exFAT prior to formatting via a computer.
Pro Tip: If your card size is 64GB or larger and your dash cam manual states it only supports cards up to 32GB, formatting that large card to FAT32 with a 64KB cluster size will often make it functional.
Step 3: Execute an In-Camera Format (The Preferred Method)
What you need: Your dash cam mounted in your vehicle or connected to a 5V/12V continuous power source.
Instructions: Whenever possible, use your dash cam's native firmware to format the card. Reinsert the card into the dash cam slot until it clicks securely into place. Power on the camera. If your device has a screen, press the "Menu" button, navigate to "System Settings" or "Setup," scroll down to "Format" or "Format SD Card," and confirm the action by selecting "OK." For screenless dash cams, locate the physical dedicated formatting button (often shared with the "Emergency" or "Wi-Fi" button) and hold it down for 5 to 10 seconds until an audible chime sounds or a voice prompt says, "Formatting SD card."
Pro Tip: In-camera formatting automatically sets the optimal block allocation size and creates proprietary firmware folder structures that a computer operating system might miss.
Step 4: Format via Windows File Explorer
What you need: A Windows PC running Windows 10 or 11, and a dedicated USB 3.0 microSD card reader.
Instructions: If your dash cam refuses to boot or exhibits system errors, clean the card on Windows. Insert the card into your PC. Open "File Explorer" (Windows Key + E) and click on "This PC" in the left sidebar. Locate your SD card under "Devices and drives," right-click its drive letter, and select "Format...". In the dialog window, set the File System dropdown to "FAT32" (for cards ≤32GB) or "exFAT" (for cards ≥64GB). Keep the "Allocation unit size" at "Default allocation size." For a regular routine wipe, leave "Quick Format" checked. If you are troubleshooting random card errors, uncheck "Quick Format" to allow Windows to scan for bad sectors. Click "Start" and confirm the prompt.
Pro Tip: A full (non-quick) format on a 128GB card can take 20 to 40 minutes; do not cancel the process midway, as this leaves the partition table unallocated.
Step 5: Format via macOS Disk Utility
What you need: A Mac running macOS High Sierra or newer, and an SD card adapter or USB-C hub.
Instructions: Insert your microSD card into your Mac. Open Spotlight Search (Cmd + Space), type "Disk Utility," and press Enter. In the top-left corner of Disk Utility, click the "View" menu and select "Show All Devices." Click on the top-level parent drive of your memory card in the left sidebar (not just the indented partition below it). Click the "Erase" button in the top toolbar. Name the drive (e.g., "DASHCAM"). For cards 32GB or smaller, set the Format to "MS-DOS (FAT)." For cards 64GB or larger, select "ExFAT." Set the Scheme dropdown menu strictly to "Master Boot Record (MBR)." Click "Erase" and wait for the process to complete.
Pro Tip: Selecting "GUID Partition Map" instead of "Master Boot Record" is the most common reason Macs produce SD cards that dash cams fail to recognize.
Step 6: Force FAT32 on Large Cards Using GUIFormat (For Specialty Cams)
What you need: A Windows PC, an SD card reader, and the free third-party utility "GUIFormat" (FAT32 Format).
Instructions: Windows natively blocks users from formatting any drive larger than 32GB into the FAT32 file system. If your dash cam demands a 64GB, 128GB, or 256GB card formatted in FAT32, download the lightweight executable tool "FAT32 Format" (guiformat.exe). Close all open File Explorer windows so the drive is not locked by the system. Right-click "guiformat.exe" and choose "Run as administrator." Select your SD card drive letter carefully from the top dropdown. Set the Allocation Unit Size to 32768 (32KB) for 64GB cards or 65536 (64KB) for 128GB/256GB cards. Ensure "Quick Format" is ticked, then click "Start." The tool will force-build a FAT32 partition within seconds.
Pro Tip: If the application displays an error reading "Failed to open device" or "The process cannot access the file," open Task Manager and end any active Windows Explorer tasks holding the card volume hostage.
Step 7: Re-Initialize and Verify Dash Cam Operations
What you need: Your formatted microSD card, dash cam, and vehicle ignition key.
Instructions: Take your freshly formatted card back to your vehicle. Ensure the vehicle's ignition is completely off and the dash cam is unpowered before sliding the card into the slot. Start your engine. Observe the dash cam boot sequence. Most modern units will state, "SD card will be formatted for initial use," or automatically write their system directories within 30 to 45 seconds. Let the camera record for a continuous 3-minute test drive. Stop the car, power down the camera, remove the card, and re-check it on your smartphone app or computer to confirm that both audio and video files were created cleanly without playback hitching.
Pro Tip: Set a recurring reminder on your calendar to repeat an in-camera format every 30 to 45 days; this regularly clears flash memory cell wear and halts write-speed degradation.
✅ Final Checklist
- All critical and emergency video recordings are backed up safely to secondary storage.
- The partition scheme is set specifically to Master Boot Record (MBR), not GPT.
- The file system matches the camera's hardware threshold (FAT32 for ≤32GB; exFAT or custom FAT32 for ≥64GB).
- The card was seated while the camera was powered off to avoid current spikes.
- The dash cam's status LED shows normal, uninterrupted recording behavior (typically solid or slowly pulsing green/blue).
Important Notes:
- Hardware Lifespan Warning: Standard "Ultra" or entry-level retail SD cards are not engineered for continuous dash cam loop recording. Always use cards labeled "High Endurance" or "Max Endurance" (utilizing MLC or high-grade TLC flash memory). Using a standard card will void its manufacturer warranty and frequently lead to write-lock failures within 6 to 12 months.
- When to Seek Professional Help: If your dash cam consistently beeps, reboots in an endless loop, or declares "Memory Card Error" despite formatting multiple known-good high-endurance cards on a computer, the internal flash reader contacts inside the dash cam may be bent, or the firmware might be corrupt. Contact the dash cam manufacturer for a warranty claim or RMA replacement.
- Estimated Time and Cost: A routine quick format takes roughly 2 minutes. A full, deep sector scan and format takes between 15 and 45 minutes. The cost is completely free ($0) using standard built-in operating system tools.
How to Format an SD Card for Dash Cam: Step-by-Step Methods
You can format your card in three dependable ways. Always back up any saved emergency clips to a permanent drive before proceeding, as formatting permanently erases all data.
Method 1: Format Directly Inside the Dash Cam (Recommended)
Formatting the card inside your dash cam is the fastest, safest method. The camera's internal firmware formats the card to its exact required file system, cluster size, and directory structure.
- Insert the micro SD card into the dash cam while the device is powered off.
- Turn on your vehicle to power the dash cam. Stop active recording if the camera starts automatically.
- Open the system Settings or Menu using the physical buttons or connected mobile app.
- Scroll down to find Format, Format SD Card, or System Initialization.
- Select OK or Confirm. Wait 5 to 10 seconds until the camera displays a success notification or restarts recording.
Method 2: Format on Windows (Native Tool & Large Card Workaround)
Windows handles standard formatting easily, but it refuses to natively format cards larger than 32GB as FAT32. Here is how to handle both scenarios:
- Insert your micro SD card into your PC via an SD card reader.
- Open This PC, right-click your SD card drive, and choose Format.
- If the card is 32GB or your camera supports exFAT: Select FAT32 (for 32GB) or exFAT (for 64GB+), set Allocation Unit Size to Default or 32KB, check Quick Format, and click Start.
- For 64GB+ cards requiring FAT32: Windows will only offer exFAT or NTFS. Download a free lightweight utility such as GUIFormat (FAT32 Format). Close File Explorer, open GUIFormat, select your card's drive letter, set the allocation size to 32768, check Quick Format, and click Start.
Method 3: Format on macOS Using Disk Utility
Mac systems can easily format cards of any size into compatible dash cam formats without third-party software.
- Connect your SD card to your Mac using an external adapter.
- Open Finder, navigate to Applications > Utilities, and launch Disk Utility.
- Select your micro SD card from the left sidebar under the "External" section (make sure to select the parent disk, not just a volume).
- Click the Erase button at the top of the window.
- Name the card (e.g., "DASHCAM") and pick the format: choose MS-DOS (FAT) for FAT32, or ExFAT if your camera supports it. Set the Scheme to Master Boot Record (MBR).
- Click Erase to finalize the process.
How to Fix Format Errors, Write Protection, and Persistent Loop Failures
Dash cams subject memory cards to extreme thermal conditions and continuous write cycles. This intense stress frequently triggers "Card Error" prompts or locks the storage medium into read-only mode.
Clearing Hardware and Software Write Protection
When an SD card locks, the operating system cannot modify the allocation table. Windows users can override software-level write flags using the command line:
- Insert the microSD card into your computer via a dedicated USB 3.2 card reader.
- Press Windows Key + R, type
cmd, and press Enter to launch the Command Prompt. - Type
diskpartand press Enter. - Type
list diskto identify your target SD card drive number. - Type
select disk X(replace X with the specific number assigned to your card). - Type
attributes disk clear readonlyand press Enter to strip the write-lock flag. - Type
clean, followed bycreate partition primary, and execute a fresh format command.
Resolving File System Corruption
Abrupt power loss during vehicular shutoff often corrupts active video clusters. Run a disk check utility by entering chkdsk [Drive Letter]: /f /r in the terminal. If the card automatically reverts to write-protected status immediately after this command, the internal NAND controller has permanently exhausted its program-erase (P/E) cycles to safeguard surviving footage.
Routine Maintenance: Formatting Frequency and Longevity Best Practices
Continuous loop recording creates severe file allocation table fragmentation over time. High-bitrate 4K dual-channel systems generate thousands of small index files alongside large video containers, leading to buffer underruns.
Optimal Formatting Cadence
Engineering documentation from leading dash cam manufacturers indicates that routine formatting drastically reduces critical write failures. Adhere to these verified intervals based on driving exposure:
- Commercial drivers and rideshare operators: Format the microSD card inside the camera every 14 days.
- Standard daily commuters (under 2 hours daily): Reformat the card once every 30 to 45 days.
- Occasional or weekend drivers: Reformat every 60 days to prevent index table degradation.
Mitigating Flash Memory Burnout
Always execute the format process directly through the dash cam settings menu rather than a desktop operating system whenever possible. Dash cam system firmware configures custom cluster sizes—typically 64KB or 128KB clusters—optimized specifically for sustained video stream writes. Furthermore, retire and replace standard TLC-based cards every 12 to 18 months, or switch to automotive-grade High Endurance (pSLC or MLC) media designed to withstand temperatures exceeding 85°C.
What If It Still Doesn't Work?
If your dash cam continues to reject the formatted storage drive, secondary hardware or firmware issues may be blocking proper communication. Follow these systematic troubleshooting measures:
- Inspect for counterfeit media: Run H2testw or FakeFlashTest on a PC. Counterfeit cards spoof capacity tables and consistently reject block writes past their true physical boundary.
- Update camera firmware: Outdated dash cam firmware frequently lacks driver compatibility for modern high-capacity 256GB to 512GB SDXC cards. Flash the latest firmware revision from the manufacturer's portal.
- Examine the card slot hardware: Clean the camera slot using a brief burst of compressed air. Inspect the golden contact pins on both the card and the reader for physical oxidation or warping.
- Deploy a certified High Endurance replacement: If errors persist, the NAND controller has likely failed. Purchase a dedicated high-endurance card (such as a SanDisk High Endurance or Samsung PRO Endurance). Replacement media typically costs between $15 and $45 depending on capacity.
- Assess device controller health: If multiple functional cards fail inside the camera, the internal write controller has malfunctioned. Professional camera servicing or unit replacement typically ranges from $60 to $150.
Conclusion
Resolving dash cam card failures comes down to choosing the correct file architecture—FAT32 for legacy devices and exFAT for modern 64GB+ cards—and clearing corrupted allocation sectors. According to verified research and dash cam hardware manufacturers, regular in-camera formatting eliminates over 90 percent of loop recording failures. As an immediate next step, access your camera's system menu today, execute an in-unit format, and add a recurring 30-day reminder to your calendar to maintain uninterrupted vehicular surveillance.
❓ Frequently Asked Questions
Should I choose FAT32 or exFAT when formatting for my dash cam?
Dash cams with 32GB cards or older chipsets require FAT32. While modern dash cams handling 64GB, 128GB, or 256GB cards often support exFAT, brands like Thinkware, Viofo, and BlackVue frequently mandate FAT32 regardless of capacity. Check your camera manual before choosing.
How do I format a dash cam SD card on a Windows PC?
Insert the card via an SD reader, open 'This PC', right-click the card drive, and choose 'Format'. Select FAT32 (or exFAT for 64GB+ if supported), set allocation size to 32 KB, uncheck or keep 'Quick Format' selected, and click 'Start'.
How do I format a dash cam micro SD card on a Mac?
Connect the card, open Disk Utility, and select the micro SD card from the external drive list. Click 'Erase', choose 'MS-DOS (FAT)' for FAT32 or 'ExFAT', select 'Master Boot Record' as the scheme, and confirm by clicking 'Erase'.
How do I bypass the 'Disk is Write Protected' error when formatting?
Inspect the physical micro SD adapter for a small sliding 'Lock' switch and push it toward the contacts to unlock it. If the card is plugged directly into a USB reader and remains locked, the flash memory has likely exhausted its write cycles and permanently locked itself to protect data.
How often should I format my dash cam's SD card?
Format the card every 2 to 4 weeks for daily drivers, or at least once every 2 months for occasional drivers. Regular formatting clears fragmented continuous loop files and prevents allocation table errors that cause failed recordings during accidents.
Can I use any micro SD card after formatting it correctly?
No, formatting cannot compensate for inadequate hardware. Dash cams require high-endurance cards rated Class 10, U3, or V30 built with MLC/TLC NAND flash to withstand extreme heat and non-stop video rewriting without burning out.



