
How to Attach Dash Cam to Windshield Proven 2026 Guide
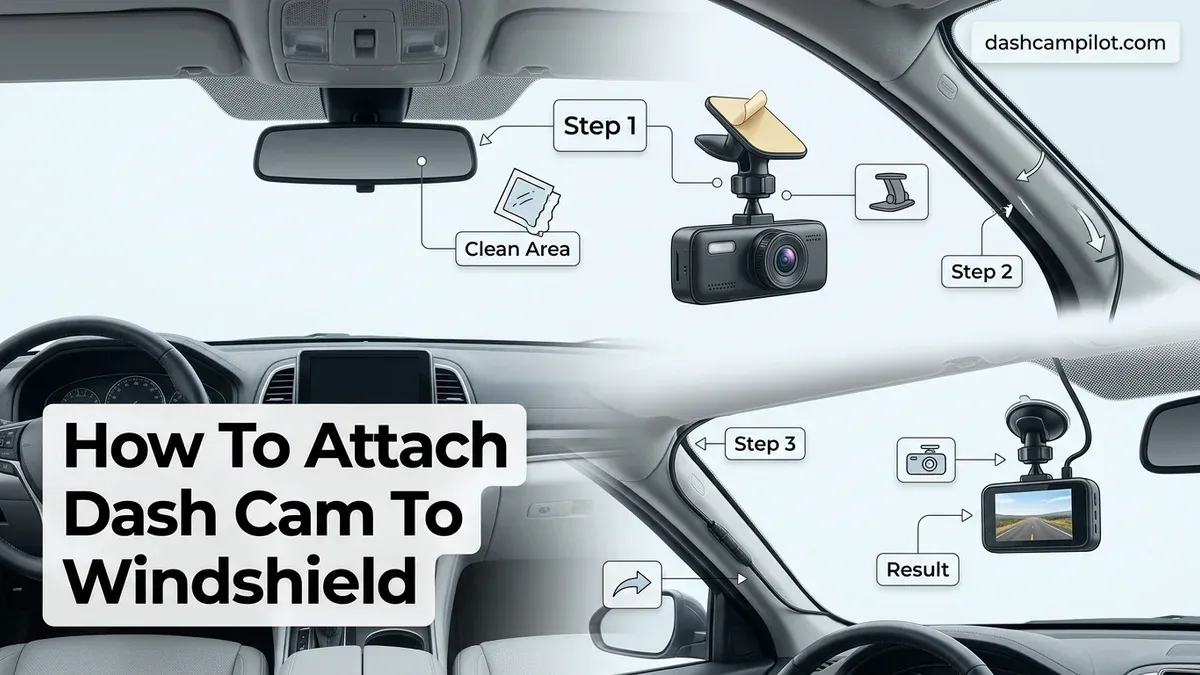
The most reliable way to attach a dash cam to your windshield is by applying an electrostatic sticker directly behind your rearview mirror, bonding a 3M VHB adhesive mount onto it, and allowing the bond to cure for 24 hours before attaching the camera. Suction cups offer quick removal, but structural adhesive paired with static film creates a permanent, heat-resistant hold that will not damage your glass or leave sticky residue when removed.
Executing this installation properly protects your investment and ensures your safety. A dash cam that falls while driving creates a dangerous distraction and leaves you without recorded evidence during an accident. Getting the physical placement and surface prep right the first time guarantees clear footage, protects vehicle safety sensors, and keeps your installation fully street-legal.
Key Takeaways
- Clean the windshield thoroughly with 70% isopropyl alcohol to remove road grime and interior off-gassing oils.
- Mount the camera high behind the rearview mirror inside the wiper clearing path for unobstructed footage.
- Apply an electrostatic sticker first to protect window tint and allow clean, residue-free removal later.
- Press 3M VHB adhesive firmly for 30 seconds and let it cure 24 hours before hanging weight.
- Warm cold windshield glass using vehicle defrosters before installation to guarantee maximum chemical adhesion.
Why Dash Cam Mounts Fall Off: Adhesion Failure and Placement Mistakes
Most falling dash cams are not defective; they are installed on improperly prepared glass or subjected to thermal stress before the adhesive can bond. Windshields endure extreme conditions that compromise low-quality mounts within weeks.

The Culprits Behind Lost Adhesion
- Surface Contaminants: Automotive glass carries invisible layers of off-gassed dashboard vinyl plasticizers, silicone detailer sprays, and oils that prevent adhesive pads from making direct molecular contact with the glass.
- Thermal Shock: Windshield temperatures routinely exceed 140°F (60°C) in direct sun. Cheap foam tapes soften and liquefy, while suction cup air pockets expand and break their vacuum seals.
- Mounting Over Frit Bands: The black ceramic dot matrix (frit) surrounding modern rearview mirrors creates microscopic air channels. Installing adhesive tape or suction mounts directly over these raised dots leads to rapid air leakage and mechanical failure.
- Instant Weight Loading: Hanging a heavy dual-channel 4K camera immediately after pressing the bracket to the glass stresses the tape before it reaches handling strength.
Placement Errors That Compromise Footage and Legal Compliance
Modern vehicles feature Advanced Driver Assistance Systems (ADAS) housed in a plastic housing behind the rearview mirror. Placing your mount directly on or directly under this housing can block forward-facing radar or emergency braking cameras. Furthermore, mounting the camera outside the physical sweep path of your windshield wipers means your footage will be unreadable during rain or snow. Most jurisdictions strictly limit windshield attachments to a 5-inch square on the passenger side or a 7-inch square on the lower driver-side corner to prevent dangerous blind spots.
Master Windshield Dash Cam Installation in 7 Simple Steps
Installing a dash cam provides invaluable peace of mind, tamper-proof accident evidence, and protection against insurance fraud. However, improperly mounting your camera can block your driving visibility, create dangerous cord entanglements, or result in the camera falling off the windshield on hot summer afternoons. Following these methodical steps ensures your dash cam stays rock-solid, remains legally compliant, and captures the clearest possible perspective of the road ahead.
Step 1: Choose the Optimal Placement Behind the Rearview Mirror
What you need: The dash cam unit, a piece of painter's tape, and your vehicle's owner manual.
Instructions: Sit comfortably in the driver's seat in your normal driving posture to identify your windshield blind spots. The ideal location is directly behind or slightly to the passenger side of the rearview mirror. This position keeps the device outside your primary line of sight while placing the lens near the center axis of the vehicle. Ensure the lens falls within the clearing path of your windshield wipers so rainy drives do not obscure the footage. Use a small piece of painter's tape to mark the outside or inside perimeter of this target spot.
Pro Tip: Check your local traffic laws regarding windshield obstructions; many jurisdictions require aftermarket accessories to sit within the top 5 inches of the windshield or entirely behind the rearview mirror perimeter.
Step 2: Thoroughly Clean and Prep the Windshield Glass
What you need: 70% or higher isopropyl alcohol, two clean microfiber cloths, and an automotive glass cleaner (optional).
Instructions: Road film, interior off-gassing, and finger oils prevent mounting tape and suction cups from bonding effectively. First, clean the target area with glass cleaner to remove heavy dust and grime. Next, pour a small amount of isopropyl alcohol onto a clean microfiber towel and aggressively buff the exact mounting area for 30 seconds. Wipe the area dry with the second, clean towel. Allow the glass to air-dry completely for 2 to 3 minutes until no haze or moisture streaks remain.
Pro Tip: Never mount an adhesive bracket when the glass is ice-cold or blazing hot; optimal installation temperatures range between 65°F and 85°F (18°C to 29°C) to ensure chemical adhesion.
Step 3: Apply the Electrostatic Windshield Film
What you need: The transparent electrostatic sticker (included in most modern dash cam kits) and a plastic squeegee or credit card.
Instructions: Peel off protective backing label #1 from the electrostatic film. Carefully position the film over the cleaned glass marker you established in Step 1. Starting from one edge, slowly press the film against the windshield, allowing it to cling naturally to the glass. Take your plastic squeegee or credit card wrapped in a microfiber cloth and firmly press from the center outward to push out any trapped air bubbles until the transparent sheet is completely smooth and clear.
Pro Tip: Electrostatic film prevents difficult-to-remove 3M adhesive residue on your windshield and makes relocating or removing the dash cam in the future completely effortless.
Step 4: Secure the Mounting Bracket to the Glass
What you need: Dash cam mounting bracket with high-bond adhesive pad (or heavy-duty suction cup mount).
Instructions: If using an adhesive mount, peel off the protective red backing strip from the 3M VHB tape. Carefully center the mount directly over the electrostatic film. Press the mount firmly against the windshield, applying steady, direct pressure with both thumbs (roughly 30 to 40 pounds of force) for a full 60 seconds without shifting or wiggling the bracket. If using a suction mount, press the suction cup flat against the bare glass (not over the film), push the center inward to expel air, and flip the locking lever down into place.
Pro Tip: If using an adhesive mount, wait at least 15 to 20 minutes before clipping the heavy camera onto the mount to give the pressure-sensitive adhesive time to cure and achieve initial bond strength.
Step 5: Attach the Dash Cam and Align the Lens Angle
What you need: Dash cam body and a live preview connection (either the built-in LCD screen or smartphone Wi-Fi app).
Instructions: Slide or snap the dash cam unit into the windshield bracket until you hear a distinct, positive click indicating it has locked in place. Power the camera on temporarily using a portable power bank or the vehicle's 12V socket. Look at the live feed and adjust the camera's vertical swivel. The standard rule of thumb for dash cam framing is the "60/40 rule": 60% of the screen should capture the road and traffic ahead, while 40% captures the sky above the horizon.
Pro Tip: Aiming the camera too high toward the sky overexposes the image due to sky brightness, turning oncoming vehicles and crucial license plates into dark, illegible silhouettes.
Step 6: Route and Conceal the Power Cable
What you need: Included 10–12 foot power cable, plastic trim pry tool, and adhesive cable clips.
Instructions: Plug the mini/micro-USB or USB-C power lead into the top of the dash cam. Route the cable upward and gently tuck it into the seam between the top edge of the windshield glass and the headliner using the plastic pry tool. Work the wire across toward the passenger side A-pillar. Carefully push the wire behind the rubber weatherstripping down the door frame, or tuck it behind the plastic A-pillar trim panel. Continue guiding the wire beneath the passenger footwell or glove box using adhesive clips, bringing it cleanly to your 12V auxiliary power port or USB charging socket.
Pro Tip: If your vehicle has side-curtain airbags built into the A-pillar, never run the cable directly across the airbag deployment seam. Route the wire behind the airbag canister or down along the windshield edge to prevent dangerous cord deployment during a crash.
Step 7: Perform System Startup, Format Storage, and Test
What you need: Vehicle ignition key, high-endurance MicroSD card (Class 10, U3/V30 rated).
Instructions: Insert your high-endurance memory card into the camera slot until it clicks. Start your vehicle's engine. Observe the camera to confirm it automatically boots up and begins recording (usually indicated by a blinking red light or recording timer on the screen). Open the settings menu via the buttons or companion smartphone app and select "Format SD Card." Formatting the card directly inside the dash cam ensures proper file system structure and prevents write errors during critical emergency recordings.
Pro Tip: Turn off your vehicle's engine and remove the key to ensure the dash cam properly powers down and saves the final video file, confirming your 12V outlet turns off with the ignition.
✅ Final Checklist
- The camera is positioned out of the driver's direct field of view and sits behind the windshield wiper sweep zone.
- The mounting bracket is securely attached without air pockets, peeling edges, or excessive vibration.
- The camera lens is angled to capture 60% road and 40% sky with a level horizon.
- Power wiring is completely tucked away and does not impede side-curtain airbag deployment or passenger legroom.
- The MicroSD card has been formatted inside the camera menu and loop recording is visibly active.
Important Notes:
- Safety Warning: Always disconnect the vehicle's negative battery terminal if removing A-pillar trim panels containing live side-curtain airbag modules.
- When to Seek Professional Help: If you plan to install a 3-wire hardwire kit into your fuse box for 24/7 parking surveillance and are unfamiliar with multi-meters, add-a-fuse taps, or vehicle electrical systems, hire a certified 12V automotive technician.
- Estimated Time and Cost: A standard 12V cigarette lighter installation takes 25 to 40 minutes. Supplies typically cost $0 to $15 if you already own basic cleaning supplies and the dash cam kit includes mounting hardware.
How to Attach a Dash Cam to Your Windshield: Step-by-Step Installation Procedure
Follow this verified process to secure your camera baseplate firmly against heat, vibration, and road shocks.
Step 1: Map the Optimal Windshield Zone
Sit in the driver's seat in your normal driving posture to determine sightlines. Your ideal target zone is high on the windshield, tucked directly behind the rearview mirror on the passenger side.
- Confirm the camera lens sits entirely within the sweep of the windshield wiper blades.
- Ensure the camera unit is hidden from your primary line of sight behind the mirror glass to satisfy legal view-obstruction rules.
- Keep the bracket at least 1 inch away from any internal vehicle sensor housings to avoid interference.
- Temporarily power the unit via a portable battery or 12V adapter to check the live view. Ensure the horizon is balanced at roughly a 50/50 sky-to-road ratio.
Step 2: Strip Contaminants from the Glass
Never clean mounting glass with standard domestic glass cleaners, as they leave behind anti-fog coatings and surfactants that ruin acrylic adhesives. Clean the targeted glass area using a lint-free microfiber towel dampened with 70% to 90% isopropyl alcohol. Wipe firmly in a circular motion, then buff the area completely dry with a fresh microfiber cloth. Let the surface air-dry for two minutes to allow total evaporation.
Step 3: Apply the Electrostatic Film
Electrostatic film uses static energy to cling flush against glass without liquid glue. It acts as an intermediary layer, saving you from scraping cured adhesive off your windshield later.
- Peel the protective backing off the transparent electrostatic sheet.
- Align the sheet against your pre-cleaned target zone on the windshield.
- Press from the center outward using an installation squeegee or plastic card to push out all trapped air bubbles.
- Confirm the film sits completely flat without creases or edge lifting.
Step 4: Bond the Adhesive Baseplate and Cure
Most reputable dash cams use high-grade 3M VHB (Very High Bond) acrylic foam tape. If the ambient temperature inside your car is below 60°F (15°C), warm the windshield and adhesive pad briefly with your car's defroster to ensure proper tack.
- Peel the red release liner from the mount's adhesive baseplate. Avoid touching the exposed sticky surface with your fingers.
- Align the mount precisely within the marked outline on the electrostatic film.
- Press the baseplate against the glass with firm, continuous thumb pressure for 60 full seconds. This initial compression activates the pressure-sensitive adhesive.
- Critical Step: Do not attach the dash cam yet. Detach the camera body from the mount if it is modular, or leave the camera supported without cable tension. Allow the adhesive to cure for 12 to 24 hours. Acrylic foam reaches 50% strength in 20 minutes, 90% strength after 24 hours, and 100% strength after 72 hours.
Alternative: Securing a Suction Cup Mount
If you switch vehicles frequently and must use a suction mount, clean the rubber diaphragm and glass thoroughly with alcohol. Lightly moisten the edge of the cup with a damp finger, press the cup firmly against the glass to displace all internal air, and flip the locking lever. Check the seal quarterly, as suction mounts naturally lose pressure over time.
Choosing the Optimal Windshield Location: Wiper Zones, ADAS Sensors, and Legal Clearance
Positioning a dash cam requires balancing optical clarity with automotive safety systems. Mounting the unit incorrectly can disable driver-assist features or violate regional vehicle equipment codes.
Navigating the Swept Wiper Area and ADAS Housings
Modern 2026 vehicles feature integrated Advanced Driver Assistance Systems (ADAS) housed in bulky modules around the rearview mirror. To maintain factory sensor calibration, place the dash cam at least one inch away from the ADAS plastic shroud. Simultaneously, verify that the camera lens sits directly inside the sweep path of the windshield wipers. Mounting outside the wiped area guarantees that rain, road salt, and road grime will obscure recorded footage during adverse weather.
Adhering to Windshield Obstruction Laws
Legal regulations strictly govern forward field of view. According to federal standard FMVSS 128 and state-level statutes such as California Vehicle Code 26708, windshield mounts must occupy specific zones:
- Center positioning directly behind the rearview mirror, remaining outside the driver’s direct line of sight.
- Placement within the top 5 inches of the windshield, typically defined above the AS-1 demarcation line.
- Alternatively, within a 7-inch square area on the lower passenger-side corner of the windshield.
What If the Mount Still Falls Off: High-Heat Fixes and Alternative Mounting Solutions
Solar radiation quickly compromises windshield adhesion. Closed vehicle cabins regularly reach interior temperatures exceeding 140°F (60°C), causing standard vinyl suction cups to outgas and detach.
Upgrading to High-Temperature Adhesives
Standard rubber adhesives degrade rapidly under ultraviolet exposure. Transitioning to heat-rated structural acrylic adhesive prevents mount separation:
- Strip the failing factory pad completely using a plastic razor blade and 90% isopropyl alcohol.
- Apply a direct replacement pad made of genuine 3M VHB 5952 acrylic foam, rated for continuous exposure up to 250°F (121°C).
- Install an automotive-grade electrostatic sticker between the windshield glass and the adhesive to protect tint films and simplify future removal.
Rearview Mirror Stem Clamps
For vehicles exposed to extreme desert heat or textured frit glass, mechanical mounting provides the highest reliability. Rigid aluminum brackets clamp directly onto the cylindrical metal stem of the rearview mirror. This method eliminates adhesives entirely, positions the dash cam securely on the vehicle's centerline, and avoids heat-induced bonding failures.
What If It Still Doesn't Work?
If recurring detachment, optical obstruction, or electrical interference persists despite proper mounting, take these advanced troubleshooting steps:
- Inspect for Windshield Coatings: Acoustic glass and aftermarket ceramic tint reject adhesives differently. If your windshield features micro-textured solar control glass, mount the unit exclusively to the bare glass beneath the AS-1 line or use a mechanical mirror clamp.
- Check for Micro-Vibrations: Stiff sport suspensions cause repeated high-frequency vibrations that crack cheap mount plastics. Upgrade to a ball-and-socket bracket reinforced with glass-filled nylon.
- Verify Temperature Cure Times: Adhesives applied in ambient temperatures below 50°F (10°C) fail to achieve molecular bonding. Warm the windshield with the vehicle defroster before application.
- Seek Professional Installation: Contact a MECP-certified (Mobile Electronics Certified Professional) technician. Professional dash cam mounting and concealed hardwiring typically cost between $75 and $150, ensuring proper ADAS clearance and permanent mechanical stability.
Conclusion
Securing a dash cam permanently relies on meticulous glass preparation, heat-tolerant acrylic bonding, and placement that honors ADAS clearances and local visibility laws. According to verified research and automotive equipment safety standards, resolving thermal degradation through high-grade VHB adhesives or stem clamps prevents sudden mount failure during vehicle operation. As an immediate next step, verify your windshield’s AS-1 line and clean the designated surface thoroughly with isopropyl alcohol before applying structural tape.
❓ Frequently Asked Questions
How do I attach a dash cam without damaging windshield tint?
Apply a static cling electrostatic film directly onto the tinted glass first, smoothing out all air bubbles. Stick the dash cam's 3M adhesive pad directly to this film rather than the tint itself. When removal is needed, peeling the film takes off the entire assembly without ripping or bubbling your window film.
Why does my dash cam mount keep falling off in hot weather?
Direct sunlight softens low-grade adhesives and causes suction cups to lose their vacuum seal as trapped air expands. To solve this, clean the glass with isopropyl alcohol and upgrade to authentic 3M VHB (Very High Bond) double-sided tape rated for automotive exterior temperatures. Applying firm pressure for 30 seconds during initial contact is critical for forming a structural bond.
Can I mount a dash cam over the black dot matrix on the windshield?
Avoid mounting suction cups on the black frit dots (dot matrix) because the textured, raised ceramic surface prevents an airtight seal. High-bond 3M adhesive can stick to the dot matrix, but using an electrostatic film over smooth, clear glass just below or beside the dots provides significantly stronger, flatter adhesion.
Where is it legally permissible to mount a dash cam on a windshield?
Most traffic regulations prohibit objects that obstruct the driver's direct line of sight. Legally and practically, the safest location is behind the rearview mirror on the passenger side or within a 5-inch square in the lower corner of the windshield on the passenger side. Always check state or local vehicle codes regarding windshield obstructions.
How do I safely remove a glued dash cam mount from my windshield?
Warm the exterior of the glass using a hairdryer on low heat to soften the acrylic foam core of the adhesive. Work a length of dental floss or high-tensile fishing line behind the mount in a gentle sawing motion to slice through the tape. Clean any remaining adhesive residue with isopropyl alcohol or an adhesive remover like Goo Gone.
What should I do if my car has forward-facing safety cameras behind the mirror?
Modern Advanced Driver Assistance Systems (ADAS) house forward-facing cameras in an enclosure behind the rearview mirror. Mount your dash cam slightly below or to the passenger side of this housing, ensuring neither the camera body nor its wiring crosses the vehicle's optical sensor view cones.



