
Dash Cam Guide: Specs, Mounting & Hardwire Setup
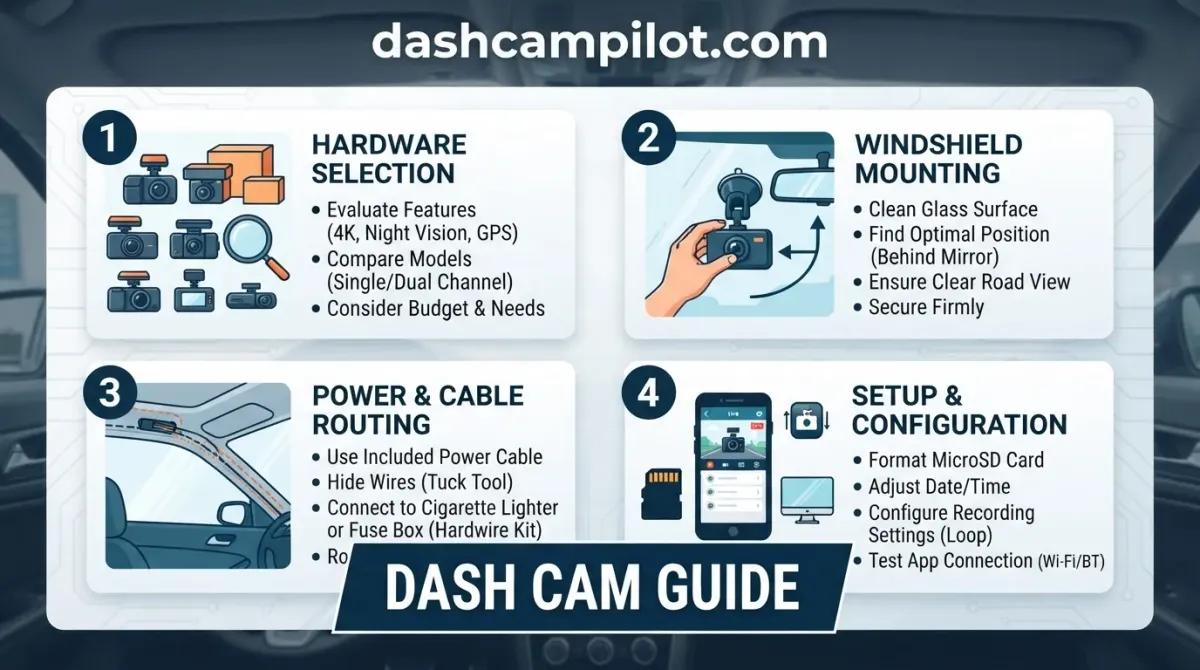
An unexpected collision can quickly turn into your word against another driver's. A dashboard camera provides objective video evidence to protect you against false insurance claims, disputed traffic tickets, and vandalism.
Selecting and using the right system requires balancing clear optical resolution, heat-tolerant internal components, and dependable memory storage. A successful setup also depends on correct windshield positioning and a safe electrical connection for round-the-clock monitoring.
The following sections outline critical hardware benchmarks, power configurations, step-by-step mounting methods, and baseline calibration settings to ensure your camera records reliably on every trip.
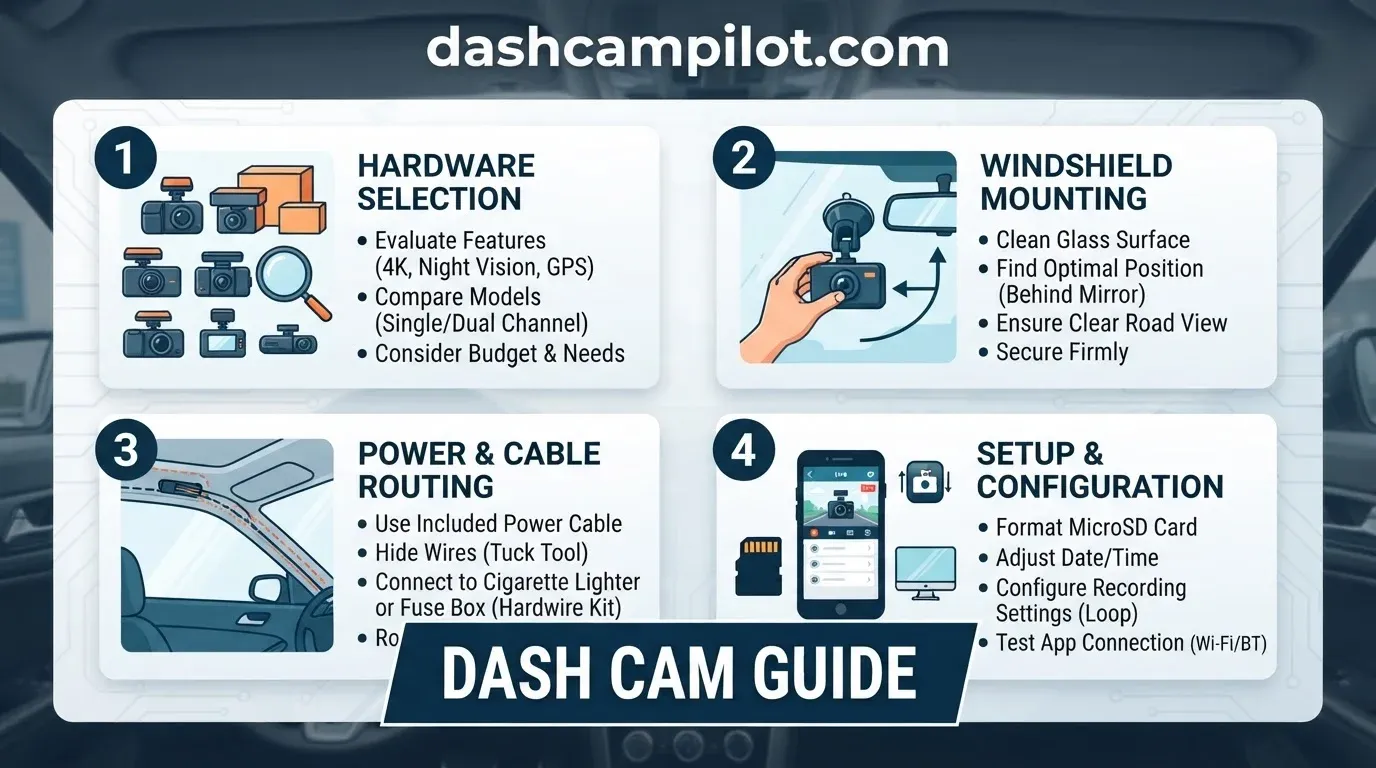
Complete Dash Cam Guide: Core Technology and Loop Recording
Continuous Loop Recording Mechanics
Standard video cameras halt when memory limits are reached, but dashboard cameras operate continuously without user oversight. The system automatically fragments continuous driving footage into manageable 1 to 3 minute video files rather than generating a single massive, fragile video stream.

Dash cams use loop recording to overwrite the oldest unprotected video when storage fills up. This constant micro-segmentation recycles card space indefinitely and ensures that an abrupt power loss only risks the current segment rather than corrupting hours of previously recorded road footage.

Automatic G-Sensor File Locking
To safeguard critical evidence, an integrated G-sensor monitors sharp directional shifts, hard braking, and impacts across three physical axes. An emergency event file triggered by a G-sensor is marked read-only to prevent loop-recording deletion during subsequent driving cycles.
Consider a sudden 3-axis deceleration event triggering a 20-second protected video clip during an intersection collision: the dash cam instantly routes the footage to a locked partition. The regular loop-recording engine bypasses this file, ensuring indisputable insurance evidence remains intact.
Dedicated Dash Cams vs. Action Cameras and Smartphones
Repurposed smartphones and action cameras struggle as vehicle recorders because they lack specialized file-cycling routines. General-purpose consumer cameras halt operation once internal storage capacity is reached, lack impact-detection write protection, and frequently suffer thermal shutdowns when mounted against a hot windshield.
Dedicated dash cams outperform general recording devices through total hands-off automation. Tied to vehicle auxiliary power, they initialize alongside the ignition, manage continuous background overwrites, and lock incident evidence independently without requiring daily configuration or driver intervention.
Essential Hardware Breakdown: Sensors, Processors, and Lenses
Optical Image Sensors and HDR Processing
The image sensor converts photons passing through the lens into digital data. In high-contrast driving conditions, sensors must balance deep shadows and blinding highlights across microsecond intervals to maintain evidentiary detail.
High Dynamic Range (HDR) hardware combines multiple simultaneous exposures into a unified frame. This processing prevents camera blinding during abrupt lighting shifts, such as leaving a dark tunnel into direct afternoon sunlight.
A STARVIS image sensor resolving a reflective license plate at night under high-contrast headlight glare relies on advanced pixel architecture to suppress wash-out where standard sensors only capture white glare.
Multi-Element Glass Lenses vs. Plastic Optics
Automotive optics require multi-element all-glass builds, typically designated as 6G or 7G. Each glass layer corrects optical aberrations, chromatic fringing, and geometric distortion across wide viewing angles.
Windshields routinely trap cabin heat exceeding 60°C (140°F). Cheaper plastic lenses deform under this thermal load, causing focal shift and permanently blurred footage, whereas glass maintains structural rigidity and optical focus.
System Processor (SoC) Video Encoding and Bitrates
The System-on-Chip (SoC) serves as the primary processing engine. It ingests raw sensor data, manages image tuning, and compresses footage in real time using H.264 or the more space-efficient H.265 (HEVC) codec.
Video bitrate determines the volume of data preserved each second, typically between 15 Mbps and 30 Mbps per channel. An adequate bitrate prevents pixelation and macroblocking over complex, moving road textures.
Battery vs. Supercapacitor: Heat-Resistant Power Tips
Thermal Hazards of Lithium-Ion Dashboard Batteries
Direct sunlight turns a parked car into an oven. Windshields magnify incoming solar radiation, regularly pushing dashboard surface temperatures exceeding 60°C (140°F). These spikes quickly exceed the safe operating limits of standard lithium-ion internal cells.
When subjected to continuous heat cycles, lithium-ion pouch cells degrade rapidly and generate gas. This causes physical swelling, casing separation, and eventual fire hazards. Furthermore, failing batteries drop power instantly upon vehicle shutoff, causing unfinalized corrupt video files during crucial accident recordings.
Supercapacitor Longevity in Extreme Climates
Supercapacitors store energy electrostatically rather than through volatile chemical reactions. Because of this design, supercapacitors handle vehicle interior heat and freezing cycles far better than standard lithium-ion batteries, maintaining reliability where chemical cells fail.
A standard dash cam operating temperature range: -10 to 60 celsius outlines baseline performance, but supercapacitors withstand wider swings between winter freezes and summer parking. They do not power the unit for portable recording; instead, supercapacitors safely deliver brief reserve power to finalize the last video file when ignition cuts out.
Before purchasing, check hardware specifications for a capacitor-based power supply and operational limits reaching at least 65°C to 70°C. Prioritizing these thermal benchmarks guarantees persistent file saving without risk of heat-induced hardware deformation.
Channel and Resolution Comparison: A Buyer's Dash Cam Guide
Selecting the right camera layout ensures critical road events are preserved with evidential clarity. Hardware architecture determines physical coverage zones, while image sensors dictate whether details remain legible or blur during motion.
Single, Dual, and Triple Channel Layouts
A single-channel (1CH) system monitors only the forward roadway. It offers straightforward deployment but leaves your vehicle vulnerable to blind spots along the sides and rear bumper.
A dual-channel (2CH) configuration adds a rear-facing camera tied to the main unit. For example, pairing a 4K front camera at 30 fps with a 1080p rear camera at 30 fps reliably documents tailgating hazards and rear-end collisions.
Triple-channel (3CH) units add an interior-facing cabin lens, which serves rideshare and commercial fleet drivers. While factory OEM systems like Tesla Sentry Mode offer built-in multi-angle recording, aftermarket units deliver higher bitrates, customized mounting positions, and broader vehicle compatibility.
Resolution and Frame Rate Performance Matrix
Resolution spans from 1080p Full HD up to 4K (2160p). Higher pixel counts retain critical focal details during digital zooms, though processor bandwidth often balances spatial resolution against temporal fluidness.
Recording at 60 fps smooths high-speed motion blur on passing vehicles. However, a 4K feed at 30 fps captures sharper individual static frames of high-contrast markers like registration tags when daylight is optimal.
How to Read This Performance Matrix
This table compares physical camera layouts against processing constraints. Layout denotes the number of discrete camera sensors powered by the central recording module. Resolutions list standard vertical pixel counts: 1080p (1920x1080), 1440p (2560x1440), and 2160p or 4K (3840x2160).
Frame rates are measured in frames per second (fps). Standard dash cams run at 30 fps, while specialized forward sensors achieve 60 fps to reduce optical smear. Multi-channel setups share processor throughput, frequently requiring rear or cabin feeds to record at lower resolutions like 1080p to prevent overheating.
Triple-channel setups vary significantly across manufacturers; always verify the exact configuration regarding whether the front channel drops from native 4K down to 1440p when all three sensors record simultaneously.
Field of View (FOV) vs. License Plate Legibility
Lens coverage spans a field of view (FOV) from 120 to 170 degrees. While a 170-degree lens captures side intersections, it creates optical distortion, stretching pixels across a curved plane.
This fisheye effect compresses center-frame details, making alphanumeric plates unreadable outside a narrow distance. A balanced FOV between 135 and 140 degrees preserves sufficient perimeter coverage while retaining license plate legibility under standard braking distances.
Memory Card Selection Method: Preventing Storage Failures
High-Endurance vs. Standard Consumer MicroSD Cards
Standard consumer flash memory cards frequently trigger write errors in dash cams due to continuous high-volume overwrites. Most retail cards utilize Triple-Level Cell (TLC) architecture, which is engineered for intermittent file storage rather than non-stop data streams.
A consumer microSD card failing after 3 months of 1080p continuous driving cycles is a classic outcome of write-cycle exhaustion. High-Endurance cards employ specialized Multi-Level Cell (MLC) or pseudo-SLC (pSLC) flash, delivering the physical durability required for thousands of surveillance write hours.
Speed Class Requirements: U3 and V30 Standards
Modern video capture generates sustained data loads that overwhelm basic cards. Legacy Class 10 and UHS-I U1 cards guarantee only a 10 MB/s sequential write minimum, which triggers buffer overflow during high-bitrate recording.
To sustain an unthrottled 4K write stream, deploy memory cards certified as UHS-I U3 or Video Speed Class 30 (V30). These specifications guarantee an unbroken 30 MB/s baseline write speed, preventing dropped frames and corrupted file headers.
Formatting Schedules to Eliminate Write Errors
Continuous loop cycling causes cumulative directory fragmentation. Over time, file index wear leads to card-level file allocation corruption, often presenting as false card-read errors or unplayable clips.
Establish a regular maintenance schedule by formatting the card every 2 to 4 weeks. Always format directly within the dash cam’s system menu rather than a computer to maintain proper file allocation block sizes and rebuild the directory tree cleanly.
Windshield Mounting Technique: Safe Placement Instructions
Positioning the camera high in the center of the windshield minimizes visual clutter while maximizing horizontal road capture. The lens must sit inside the active wiper sweep path; placing it outside this zone blinds the sensor during rainfall, slush, or road spray.
Mounting directly behind the rearview mirror conceals the housing from the driver's forward field of view, preventing distraction while keeping status indicators accessible.
Ideal Positioning Behind the Rearview Mirror
📋 Physical Installation Steps
Clean glass thoroughly with isopropyl alcohol to remove oily residue. Mount the bracket directly behind the rearview mirror within the wiper sweep path to maintain optical clarity.
Check local windshield obstruction laws regarding allowable tint strips and dashboard camera zones to ensure your hardware stays above the AS-1 line or within approved perimeter areas.
Route cabling along headliner seams, avoiding active A-pillar side curtain airbag deployment paths by tucking leads behind the airbag canister rather than over its front face.
Press firmly on the mounting plate to cure the contact bond, eliminating mechanical shake across uneven asphalt surfaces.
Legal Sightlines and Airbag Deployment Hazards
Placing the camera directly within the driver's primary line of sight or across active airbag deployment paths introduces major collision hazards and violates regional traffic codes.
Tucking the power lead behind the weatherstripping seam rather than draping it across the passenger airbag panel prevents the cable from becoming a high-speed whip during an emergency inflation.
Adhesive Tape vs. Suction Cup Mounting
Adhesive 3M VHB pads outlast suction mounts by maintaining thermal stability from -30°F to 200°F. Their low profile provides exceptional vibration resistance for sharper video capture.
Suction mounts permit easy multi-vehicle swapping, but sudden temperature drops weaken the vacuum seal. The longer extension arm on suction brackets also magnifies vehicle vibrations, causing blurry frames.
Parking Mode Dash Cam Guide: Hardwire Kit Installation Steps
Assuming cigarette lighter adapters provide power when the vehicle engine is turned off is a common misconception. In modern vehicles, auxiliary sockets shut off immediately when the ignition cuts. Continuous parking surveillance requires a constant power supply coupled with an automatic low-voltage cutoff switch to monitor the vehicle safely without depleting the battery.
Parking Mode Types: Buffered Recording vs. Time-Lapse
Dash cams process unattended vehicle surveillance through distinct operational modes. Buffered recording holds video continuously in temporary RAM cache, permanently saving footage from 10 seconds before an incident occurs through 30 seconds after motion or impact triggers the sensor.
Time-lapse mode records continuous video at an economical 1 to 2 frames per second (fps), condensing hours of footage into short playback clips. Impact-activated standby leaves the unit dormant, waking up to write a single locked event clip only when the internal G-sensor registers physical disturbance.
Fuse Box Hardwiring: Switched vs. Unswitched Circuits
📋 Step-by-Step Guide
Use an add-a-fuse tap to connect the red wire to an unswitched circuit (e.g., hazard lights or door locks) that maintains 12V power when the key is out.
Tap the yellow wire into a switched ignition fuse (e.g., radio or wipers). This signal tells the camera when to toggle between driving mode and parking mode.
Crimp the black wire's C-terminal under an unpainted metal chassis bolt near the fuse box to establish a clean ground connection and complete the circuit.
Setting Low-Voltage Cutoff Limits (11.8V to 12.4V)
Hardware cutoff modules measure vehicle battery draw continuously. Setting the hardwire module cutoff switch to 12.0V to shut down parking recording before the vehicle 12V battery drops too low to start the engine protects lead-acid chemistry from draining below 50% state-of-charge.
For colder climates or vehicles with aging starter batteries, raise the cutoff threshold to 12.2V or 12.4V to ensure adequate cranking amps remain available during cold starts.
Dash Cam Troubleshooting Guide: Sensor Calibration and Settings
Calibrating G-Sensor Sensitivity Levels
Setting your internal G-sensor sensitivity too high creates an operational bottleneck. When set too aggressively, ordinary road vibrations register as vehicular collisions, permanently locking those video segments against standard loop recording.
Over time, these protected files fill your storage capacity completely. For example, adjusting the G-sensor from Level 5 down to Level 2 prevents rough railroad crossings and speed bumps from filling the SD card with locked emergency clips.
Eliminating Windshield Glare with CPL Filters
Internal dashboard reflections frequently wash out critical road details during bright midday drives. Threading a circular polarizing lens (CPL) filter onto the camera housing cuts surface glare and suppresses intense sun flares off your windshield.
Align the filter by rotating the outer ring while checking the live display until dashboard reflections vanish. Keep the optical glass free of oily road films by wiping it with microfiber during routine vehicle maintenance.
Resolving Write Speed Errors and Card Locks
Sudden write errors or unplayable clips typically stem from premature power loss or improper formatting. If the dash cam loses power before closing an active video container, the file remains unfinalized and corrupt.
Format the storage media inside the dash cam interface monthly to clear lingering allocation errors. Routine card health inspections prevent sudden file corruption and confirm that automatic write cycles run uninterrupted.
- ✓ Prioritize supercapacitors over lithium batteries to withstand extreme interior temperatures and avoid sudden thermal shutdown.
- ✓ Follow a high-endurance memory card selection method (U3/V30 rated) to prevent continuous loop recording write failures.
- ✓ Use a centered windshield mounting technique behind the rearview mirror to preserve driver visibility and optimize lens coverage.
- ✓ Complete hardwire kit installation steps using dedicated add-a-fuse taps to enable safe, 24/7 parking mode battery monitoring.
- ✓ Calibrate G-sensor sensitivity settings to capture genuine impact events without triggering false locked-file storage overflows.
❓ Frequently Asked Questions
1 What is loop recording and how does it manage memory?
Loop recording continuously writes video files in 1- to 5-minute increments onto your storage card. When storage capacity fills up, the dash cam automatically overwrites the oldest unlocked video file. Critical incident files triggered by G-sensor impacts are partitioned separately, preventing emergency footage from being erased during normal operation.
2 How do supercapacitors differ from standard lithium-ion dash cam batteries?
Supercapacitors store electrical charges electrostatically rather than chemically, offering superior thermal resistance in extreme summer heat and sub-zero winter temperatures. While lithium batteries risk swelling, leaking, or exploding under direct windshield sunlight, supercapacitors provide reliable backup energy solely to safely finalize and save video files when engine ignition ceases.
3 Why is hardwiring necessary for 24/7 parking mode surveillance?
Cigarette lighter 12V sockets shut down when vehicle ignitions turn off, eliminating parked monitoring. Hardwiring connects directly to your vehicle's fuse box using constant and accessory power circuits. This configuration powers radar, motion, or time-lapse parking surveillance while built-in low-voltage cut-off switches preserve your car battery from draining flat.
4 What is the correct method for selecting dash cam memory cards?
Choose high-endurance microSD cards featuring TLC or MLC NAND flash specifically engineered for relentless write cycles. Select cards rated U3, V30, or Class 10 with read/write speeds capable of 4K bitrate streaming. Standard consumer flash memory cannot withstand continuous automotive rewrite demands and voids most manufacturer warranties.
5 How do I install a dash cam following clean wiring instructions?
Follow structured installation steps by mounting the camera behind the rearview mirror, tucking the power cable into the headliner seam, and routing it down the A-pillar weatherstripping. Avoid obstructing side curtain airbags, then plug into an auxiliary port or fuse box tap to establish clean, hidden power.
6 Will a dash cam drain my car battery when parked?
Not if installed with an automatic low-voltage cutoff hardwire kit, which detects when vehicle battery levels drop below a safe starting threshold (e.g., 12.0V or 11.8V) and cuts power automatically.





