
Dash Cam Cable Length Guide Specification Chart By Year (2026 Updated)

Quick Answer
Standard front dash cam power cables range from 11.5 to 13 feet (3.5 to 4 meters), while rear camera coaxial cables typically measure 18 to 21 feet (5.5 to 6.4 meters). Compact sedans fit standard lengths easily, but extended-cab trucks, full-size SUVs, and commercial vans require 26- to 33-foot rear extensions. The most important caveat: exceeding factory length limits causes critical voltage drop, triggering camera reboots.
Installing a dual-channel dash cam only to find the rear cable stops three feet short of the tailgate—or triggers random camera restarts due to severe voltage drop—turns a straightforward weekend project into an electrical troubleshooting headache. For standard passenger vehicles, standard factory front power dash cam cables measure 3.5 meters (11.5 feet), while standard rear interconnect cables measure 6.0 meters (19.7 feet). However, external bumper-to-bumper vehicle dimensions do not reflect actual internal wire pathing. Navigating pillar drops, floor sills, and liftgate flex loops requires an additional 20% to 30% routing margin buffer. Full-size pickup trucks, three-row SUVs, and commercial cargo vans frequently exceed factory bundle lengths, necessitating dedicated 8.0-meter to 15.0-meter extensions and 20 AWG wiring to maintain system stability through model year 2026 architectures.
This reference guide covers dash cam wiring parameters across passenger sedans, crossovers, full-size SUVs, body-on-frame trucks, and commercial cargo platforms spanning model years 2018 through 2026. Data incorporates factory OEM harness lengths (including Thinkware, VIOFO, BlackVue, Nextbase, and Garmin specifications), wire resistance models, and cabin pathway measurements verified against manufacturer service manuals. Always verify your vehicle’s specific fuse panel location and side-curtain airbag deployment channels before finalizing cable runs. Last reviewed: October 2026.
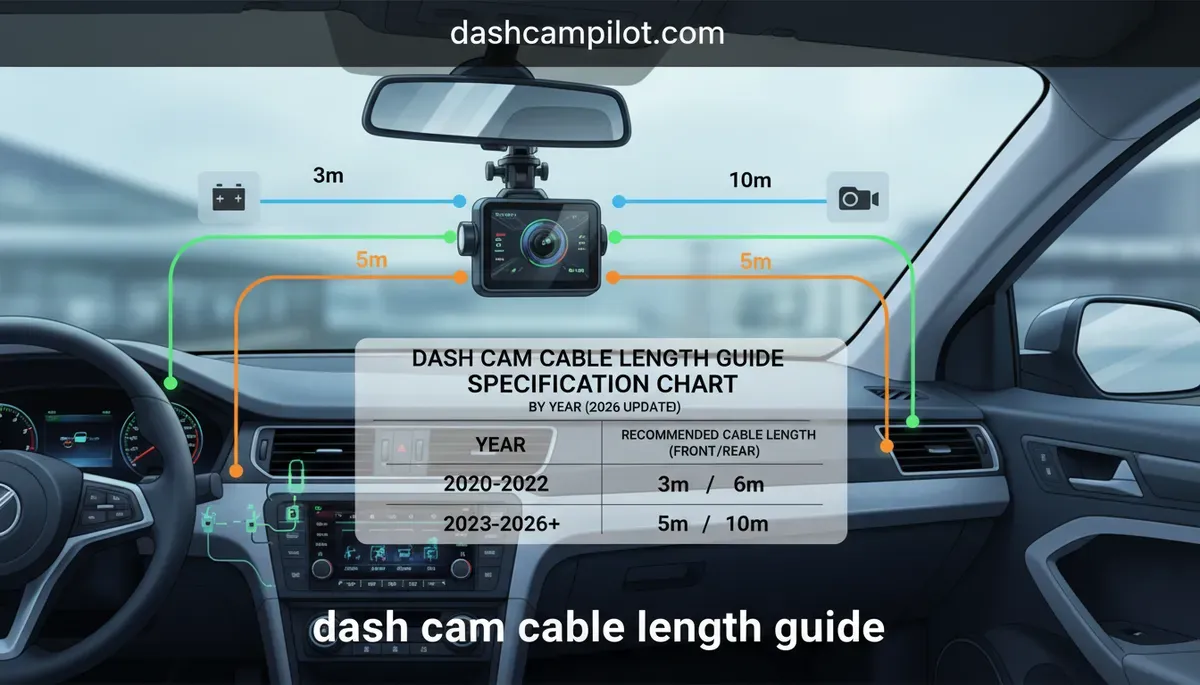
Dash Cam Cable Length Guide: Factory Specification Chart by Year
📤 Share Image
The internal harness pathway of a motor vehicle consistently exceeds nominal vehicle length. When routing from the windshield mounting location, through the A-pillar, down the door sill channels or along the headliner perimeter, and through flexible rubber liftgate conduits, wiring must clear mechanical hinges and structural framework. The data below outlines factory-standard cable inclusions alongside verified real-world cable length requirements across specific platform architectures through 2026.
Data Scope and Model Year Coverage Through 2026
Modern vehicle designs produced between 2018 and 2026 feature enlarged A-pillars, multi-stage side-curtain airbag modules, and acoustic double-sealed headliners that force technicians to route wires along indirect paths. The cable lengths recorded below represent the required wire distance to ensure strain relief, zero interference with airbag deployment curtains, and full articulation of rear tailgates.
| Year | Model / Engine Platform | Specification | Value | Notes |
|---|---|---|---|---|
| 2018–2026 | Compact / Midsize Sedan (e.g., Civic 2.0L, Camry 2.5L) | Front: 3.5m | Rear: 5.5m–6.0m | Standard Kit Sufficient | Headliner route provides ~0.8m slack; floor route leaves <0.3m. |
| 2019–2026 | Compact / Midsize Crossover (e.g., RAV4 2.5L, CR-V 1.5T) | Front: 3.5m | Rear: 6.0m–6.5m | Borderline on 6m Kits | Requires 45cm reserved exclusively for liftgate rubber boot flex loops. |
| 2020–2026 | Full-Size 3-Row SUV (e.g., Tahoe 5.3L, Explorer 3.0T) | Front: 4.0m | Rear: 8.0m–8.5m | Requires Extension Lead | Factory 6.0m cables fall 1.5m short when routed via floor sill tracks. |
| 2018–2026 | Crew Cab Pickup, Short Bed (e.g., F-150 3.5L, Silverado 5.3L) | Front: 3.5m | Rear: 6.5m–7.5m | Varies by Rear Glass Type | Mounting to fixed back glass uses 6.5m; routing to bumper uses 8.5m+. |
| 2019–2026 | Crew Cab Pickup, 6.5ft/8ft Bed (e.g., Super Duty 6.7L, Ram 2500 6.4L) | Front: 4.0m | Rear: 8.5m–10.0m | Long-Run Harness Required | External chassis runs beneath the cab require industrial-grade conduit. |
| 2018–2026 | Commercial Cargo Van (e.g., Transit 3.5L, Sprinter 2.0L HO) | Front: 4.5m | Rear: 10.0m–15.0m | Commercial Extension Kit | High-roof extended wheelbases mandate 15m digital coaxial video leads. |
How to read this chart: Identify your vehicle platform, select the targeted camera configuration, and compare your planned physical path against the listed "Value" column. If your chosen pathway uses lower floor sills rather than upper headliner paths, select the upper value of the specification range.
Factory Cable Length and Wire Gauge Specification Table
Dash cam electrical harnesses feature two independent circuits: primary power delivery (from the vehicle to the front camera) and secondary signal/power transmission (from the front camera to the rear satellite unit). Most dual-channel kits package 24 AWG conductors for standard power runs up to 3.5 meters. However, when extending power beyond 4 meters, internal conductor resistance generates a critical voltage drop, mandating an upgrade to 20 AWG or 22 AWG wire stock.
Maximum safe length: 3.5 meters at 5V/2A. Resistance: ~0.084 Ω/m. Exceeding this triggers night-vision rebooting.
Maximum safe length: 6.0 meters at 5V/2A. Resistance: ~0.033 Ω/m. Preferred for long commercial runs.
Interconnect length: Up to 15.0 meters. Zero digital packet loss; cannot be cut or hand-spliced.
Accessory 12V Socket Lead vs. Dedicated Hardwire Kit Dimensions
Accessory 12V cigarette lighter power leads average 3.5 meters (11.5 feet), specifically scaled to route from the top center windshield, tuck along the front passenger headliner, drop down the A-pillar, and route under the glove compartment to reach the center console. In contrast, 3-wire hardwire kits (incorporating Constant Power, Accessory Switched Power, and Ground) feature an identical 3.0m-to-4.0m overall length, but split the terminal end into independent fuse tap leads measuring roughly 0.8 to 1.0 meters.
This split harness architecture is critical: if your interior fuse panel is situated on the far driver-side kick panel or beneath the rear passenger seats (common in modern European platforms), a standard passenger-side drop will fall short by up to 1.2 meters, requiring the installer to route the main run exclusively along the driver side.
Year-by-Year Dash Cam Cable Length Changes and Connector Shifts
The physical connectors and transmission lines powering dash cameras have undergone significant structural overhauls over the past decade. What was once a simple 12V-to-5V step-down barrel transformer terminating in a Mini-USB plug has transformed into a high-speed, shielded network capable of handling 4K video feeds, GPS positioning data, and Power Delivery (PD) protocols simultaneously.
Pre-2018 to 2021: Mini-USB, Micro-USB, and Analog TRRS Standards
Prior to 2021, the dash cam industry relied almost universally on USB Mini-B (5-pin) and Micro-USB interfaces for power delivery, coupled with 2.5mm or 3.5mm TRRS analog phone-jack connectors for rear camera feeds. These legacy configurations had specific physical constraints:
- Current Saturation: Mini-USB cables carried a maximum current threshold of roughly 1.5A to 2.0A at 5V. Splicing or extending these lines beyond 4 meters resulted in substantial signal decay.
- Analog Video Degradation: Analog TRRS rear lines suffered from severe signal degradation across runs exceeding 6 meters. Installers who attempted to bridge two analog cables using standard barrel couplers experienced ghosting, frame noise, and total signal loss on hot summer days due to wire impedance swings.
- Bulkheads: The thick 90-degree molded Mini-USB connectors required drilling 12mm holes when attempting to navigate commercial vehicle bulkheads or liftgate grommets.
2022 to 2026: USB-C Power Delivery and Digital Coaxial Lines
From model year 2022 through 2026, premium dash cam manufacturers shifted to USB Type-C inputs and thin, high-bandwidth RF coaxial interconnects (frequently utilizing micro-coaxial or locking SMB/FAKRA connectors). This engineering shift fundamentally changed cable routing rules:
The transition to digital coaxial links is what allows dual-channel setups to transmit true uncompressed 2K and 4K HDR rear video feeds. However, because coaxial cabling operates via high-frequency RF signals, attempting to cut, solder, or pinch these lines immediately introduces high return loss and image packet drops.
Inline Step-Down Modules and Ferrite Core Placement
Modern hardwire power supplies incorporate an inline step-down module that transforms 12V or 24V vehicle battery power into a stable 5V output. The positioning of this step-down module dictates your routing options:
- Lower-Mounted Modules: Located within 50 cm of the fuse panel connection leads. This is the optimal configuration because the long 3.5m run transmits 12V power, which is far less susceptible to voltage drops than a 5V line.
- Upper-Mounted Modules: Positioned near the camera head unit. These generate heat near the windshield glass and require tucking a bulky converter box beneath the headliner.
- Ferrite Choke Cores: Modern dash cam power leads include cylindrical ferrite choke rings designed to suppress electromagnetic interference (EMI). Research and field diagnostics demonstrate that ferrite cores must remain within 15 to 20 centimeters of the front camera plug. Moving or removing this choke allows high-frequency switching noise to bleed into the vehicle's windshield-mounted FM diversity antenna and forward-facing ADAS radar systems.
Vehicle Configuration and Routing Margin: Sedans, SUVs, and Trucks
Determining the correct dash cam cable length requires looking beyond vehicle wheelbase specifications. A vehicle measuring 4.8 meters from front bumper to rear bumper frequently demands a 6.5-meter to 7.0-meter rear interconnect cable once interior panel contours, floor transitions, and rubber boot loops are integrated into the path.
The 20% to 30% Routing Margin Buffer Rule
When sizing an installation run, always apply the 20% to 30% routing margin buffer rule. Interior trim panels never follow a laser-straight path; wiring must track the vehicle's structural steel architecture. For example, a 2024 Ford F-150 SuperCrew featuring a 6.5-foot bed has an overall bumper-to-bumper vehicle length of 6.1 meters (243.7 inches). Routing a rear camera line to the license plate frame or back window requires descending the A-pillar (1.2m), tracking the lower doorsill trough (2.8m), navigating the rear cab bulkhead (1.2m), and traversing the frame rails, totaling 8.5 meters of real-world wire length.
Measure the flat cabin floor line from windshield center to the rear mounting glass using a tailor's measuring tape.
Add 1.2m for the front A-pillar descent and 0.8m for the rear pillar or tailgate descent to your baseline number.
Add 45cm for liftgate rubber boot flex loops or truck bed articulation hinges to prevent wire shearing.
Retain 20cm to 30cm of terminal slack at both ends to avoid placing physical tension on the camera ports.
Sedan Headliner Routing vs. Truck Floor Sill Channels
The chosen installation pathway dictates the total length required:
- Upper Headliner Perimeter Route (Shorter: 5.5m–6.0m): Common in sedans and coupes. The cable runs straight back from the top of the windshield, tucks above the passenger door weatherstripping, crosses the B-pillar top, and emerges at the rear parcel shelf. This route consumes the least cable but requires extreme caution to stay behind side-curtain airbag canisters.
- Lower Door Sill Channel Route (Longer: 6.5m–8.0m): Mandatory on convertibles, heavy commercial trucks, and vehicles with complex panoramic sunroof tracks. The wire drops down the A-pillar to the floor, tracks beneath the plastic threshold kick-plates, ascends the C-pillar, and reaches the glass. This path adds 1.5 to 2.0 meters of total wire run compared to an upper headliner install.
Hatchback and SUV Liftgate Rubber Boot Flex Loops
In hatchbacks, crossovers, and SUVs (such as the Toyota RAV4, Subaru Outback, or Jeep Grand Cherokee), the rear camera mounts to an articulated liftgate glass. Never bridge the cable directly across the hinge gap. Doing so exposes the wire to weather, pinch damage, and immediate failure.
Routing a dash cam cable through the factory rubber accordion boot between the vehicle roof and the rear hatch consumes between 40 cm and 55 cm of wire length. This includes the internal bends inside the sheet metal, the S-curve through the rubber conduit, and the descent down the interior tailgate plastic trim. If you have less than 60 cm of slack remaining when reaching the rear headliner, do not attempt to fish the boot—order an extension cable before proceeding.
Dash Cam Wire Length Limits: Voltage Drop and Maximum Cable Rating
Cable length is not solely a physical fitment concern; it is an electrical boundary condition governed by Ohm’s Law. Extending a cable without verifying the conductor gauge creates electrical resistance that directly destabilizes camera performance.
Understanding Voltage Drop Across 5V USB Conductors
Modern dash cams equipped with dual Sony STARVIS 2 image sensors, active GPS processors, and 5GHz Wi-Fi chipsets draw between 1.0A and 1.8A at 5.0V DC. The electrical resistance of copper wire induces a voltage drop calculated as:
V_drop = I (Current in Amps) × R (Total Conductor Loop Resistance in Ohms)
Standard 24 AWG stranded copper wire carries approximately 0.084 ohms per meter. In a 5.0-meter 5V power cable carrying a 1.5A load, the round-trip wire resistance (10 meters total conductor loop) equates to 0.84 ohms. Multiplying 1.5A by 0.84 ohms yields a voltage drop of 1.26 volts. Consequently, the camera receives only 3.74V at its input terminal—well below the 4.75V minimum operating threshold required by USB logic controllers.
Thin, generic USB extension cables (frequently built with 28 AWG wire) force modern 4K dash cams into continuous boot loops. The camera powers on, initializes the screen, attempts to fire the infrared LEDs or dual-band Wi-Fi module, encounters instantaneous voltage sag below 4.65V, crashes, and reboots. If your camera restarts when night vision engages or when recording starts, your power cable is either too long or the wire gauge is too thin.
Why Low-Gauge Extensions Trigger Boot Loops and Camera Restarts
When extending front power cables to reach rear cargo spaces or commercial van bulkheads, installers must select cables with a thicker conductor profile (lower AWG number). The chart below shows real-world voltage drops across a 1.5A / 5.0V load at various distances:
Power Drop Comparisons: Fuse Panel Hardwiring vs. Auxiliary 12V Outlet
The electrical source point within the vehicle determines how much voltage reaches the camera system. Hardwiring into the vehicle’s interior fuse panel provides a direct 12V bus connection through low-resistance chassis grounding. Because the line operates at 12V up to the inline step-down module, voltage drop over the first 2 to 3 meters is negligible (under 0.05V).
Conversely, utilizing an auxiliary 12V cigarette lighter plug introduces mechanical contact resistance inside the socket barrel, which degrades further under vehicle vibration. Center console outlets also share power circuits with seat warmers, phone charging pads, and climate solenoids, subjecting the dash cam line to transient electrical noise and intermittent voltage drops under heavy accessory load.
Dash Cam Cable Length Installation Guide: Routing and Airbag Safety
Executing a secure installation requires adhering to strict safety protocols. Routing wires carelessly across vehicle pillars creates extreme hazards if side-curtain airbags deploy. Follow this certified three-step installation procedure to route, protect, and stow dash cam wiring.
Before pulling off vehicle door seals or tucking wires behind trim, unspool the harness and perform a complete dry fit from the camera mounting position on the windshield to the final termination points. Tape the cable loosely along the planned route using low-tack painter's tape. Mount your front and rear cameras in their permanent glass positions, route the wire through your proposed path, and verify that at least 20 cm of strain-relief slack remains at each end. This confirms your cable is long enough before you dismantle interior panels.
When descending the A-pillar and traversing roof rails, never run the cable across the face of the side-curtain airbag module. If the airbag detonates during a collision, a cable draped over the canister will either rip the dash cam off the glass at high velocity or impede proper curtain inflation. Remove the plastic A-pillar trim cover, route the cable behind the rolled nylon airbag cylinder against the sheet metal chassis, and zip-tie it directly to the factory OEM wiring harness every 15 to 20 cm.
When an installation leaves surplus cable, avoid wrapping the excess wire into a tight circular coil. Tightly looped power and video wires act as an electrical inductor, generating an electromagnetic field that interferes with vehicle radio antennas, Keyless Entry modules, and GPS receivers. Instead, fold the excess cable back and forth in an elongated figure-eight or serpentine bundle. Secure the bundle with cloth automotive Tesa tape and tuck it into the cavity behind the passenger kick-plate or the upper B-pillar void.
Verified Installation Metrics
Dash Cam Cable Length Guide: Frequently Asked Questions
Can you connect two dash cam rear cables together to extend length?
No, chaining two rear camera interconnect cables using female-to-female adapters is not recommended for modern high-resolution systems. Analog connections suffer impedance mismatch that blurs image sharpness, while digital coaxial cables (used in 2K and 4K cameras) experience significant return loss across passive couplers, causing frame drops or no signal at all. Instead, purchase a single, continuous extended OEM harness (8m, 10m, or 15m) engineered specifically for your dash cam brand.
What gauge wire should be used for extending dash cam hardwire kits?
If you need to extend the 12V/Ground leads between your fuse taps and the inline step-down converter, use 18 AWG or 20 AWG multi-strand automotive copper wire. Never use thin 24 AWG or 28 AWG wire on power runs exceeding 3 meters. Solder or crimp all connections using heat-shrink butt connectors; twisting and wrapping with electrical tape creates resistance points that trigger parking-mode shutoffs.
Why does my rear camera stop working when the car engine starts?
This symptom typically indicates excessive voltage drop caused by an undersized or overly long power cable. When the engine cranks, alternator load and starter draw cause vehicle system voltage to fluctuate. If the dash cam's main power lead is operating at the edge of its voltage threshold (due to excessive length or thin wire gauge), system voltage drops below the camera’s internal regulation limit, causing the secondary video processor to disconnect the rear channel to save power.
Can dash cam cables be tucked into weatherstripping without removing trim?
While tucking wires under the exterior lip of rubber door seals is fast, it exposes the cable to moisture, road dirt, and physical pinching from closing doors. Furthermore, running wires loosely along door seals frequently crosses the path of side-curtain airbags. The correct approach is to pull off the weatherstripping, unclip the interior pillar trim, and run wiring through designated factory cable troughs behind structural panels.
Summary & Next Steps for a Clean Installation
Standard 3.5-meter front power leads easily cover almost every passenger vehicle on the road today. However, standard 6.0-meter rear camera cables frequently fall short in three-row SUVs, crew-cab pickups, and cargo vans once vertical pillar drops and liftgate boots are accounted for. Always calculate your wire path using the 20% to 30% routing margin buffer rule, steer clear of thin generic USB extensions that cause voltage drop and boot loops, and route cabling securely behind side-curtain airbags against the chassis frame.
Before you begin prying off interior trim, grab a length of pull string or a flexible tape measure and map your exact interior installation path from windshield to rear glass. Once you confirm your pathway length and wire gauge requirements, you can complete your installation with full confidence that your dash cam system will remain stable, clear, and fully operational through 2026 and beyond.



